NT State Route 11 Tablelands Highway |
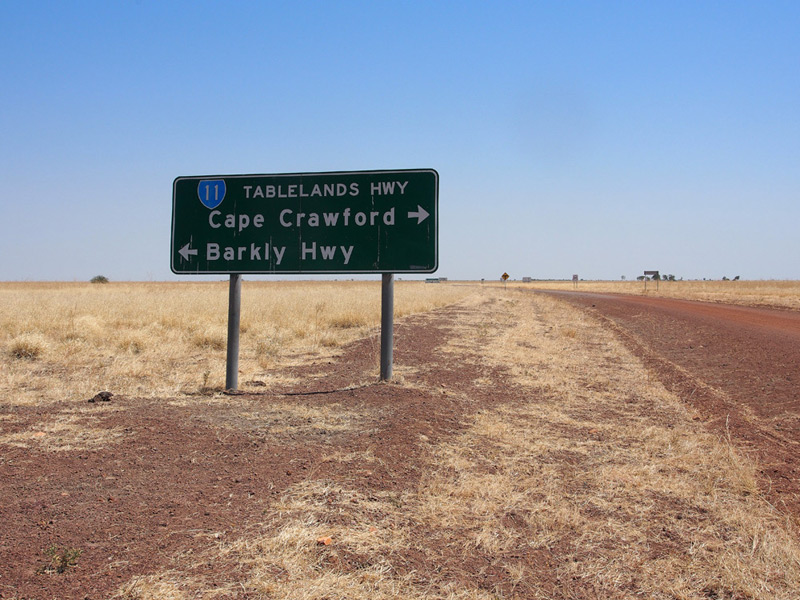
Advance Direction sign on Ranken Road approaching Tablelands Highway. Source: Peter Renshaw, September 2014.
Introduced: c1989
Length: 378km
Northern Terminus: Carpentaria Highway, Cape Crawford
Southern Terminus: Barkly Highway at Barkly Homestead
Route taken: From the Carpentaria Highway at Heartbreak Hotel, Cape Crawford, south across the Barkly Tableland to the Barkly Highway at Barkly Homestead
Duplexes: State Route 16 (for 19km between Barkly Stock Route & Calvert Road)
Focal Points: Cape Crawford, 'To Barkly Hwy'
Notable Events:
12 December 1970 - 'The Tableland Highway' officially opened
c1989 - State Route 11 allocated and progressively signed
Description:
Tableland Highway is a north-south highway bisecting the Barkly Tableland pastoral region of the Northern Territory. It was initially constructed in the 1960s as a 'Beef Road' to facilitate the movement of cattle by road train and increase the productivity of the beef industry in the area.
The vast majority of the highway is single-lane bitumen seal, with occasional wider sections at floodways and approaching bridges. There are no towns or services along its 378km length, with the exception of the Barkly Homestead roadhouse at the southern end and the 'Heartbreak Hotel' roadhouse at Cape Crawford at the northern end of the highway.
When the route numbering scheme for the Northern Territory was developed in the late 1980s, Tableland Highway was allocated State Route 11. As with most Northern Territory State Routes, route number signs are a bit hit and miss along the route.
|
Photos of State Route 11 / Tablelands Highway - Cape Crawford to Barkly Stock Route |
|
 |
Dodgy AD sign eastbound on Carpentaria Highway (NR1) approaching the junction with Tablelands Highway (SR11) at Cape Crawford. Note the missing route markers. Source: Peter Renshaw, September 2014. |
 |
AD sign westbound on Carpentaria Highway (NR1) approaching the junction with Tablelands Highway (SR11) at Cape Crawford. This time the route markers have been included, however the National Highway Route 1 shield should be a National Route 1 shield. Source: Peter Renshaw, September 2014. |
 |
ID sign assembly at the junction of Carpentaria & Tablelands Highways, Cape Crawford. There are no ID signs for Tablelands Highway at this junction. Source: Peter Renshaw, September 2014. |
 |
Tablelands Highway (SR11) looking north to the junction with Carpentaria Highway at Cape Crawford. Source: Peter Renshaw, September 2014. |
 |
AD sign northbound on Tablelands Highway (SR11) approaching the junction with Carpentaria Highway at Cape Crawford. The very green grounds of the Heartbreak Hotel can be seen on the left. Source: Peter Renshaw, September 2014. |
     |
A series of 5 signs facing southbound traffic on Tablelands Highway (SR11) as you head south from the junction with Carpentaria Highway. Note there is no standard green RD sign, only a blue services signs. 1st photo: Peter Renshaw, September 2014. 2nd & 3rd photos: Margaret Laybutt, June 2010. 4th & 5th photos: Peter Renshaw, September 2014. |
 |
Tablelands Highway (SR11) looking north towards Cape Crawford (locality marker can be seen in the background). Note the unusual '100km/h speed limit ahead' sign. Source: Peter Renshaw, September 2014. |
 |
Tablelands Highway (SR11) looking north, 2km south of Cape Crawford. Source: Peter Renshaw, September 2014. |
 |
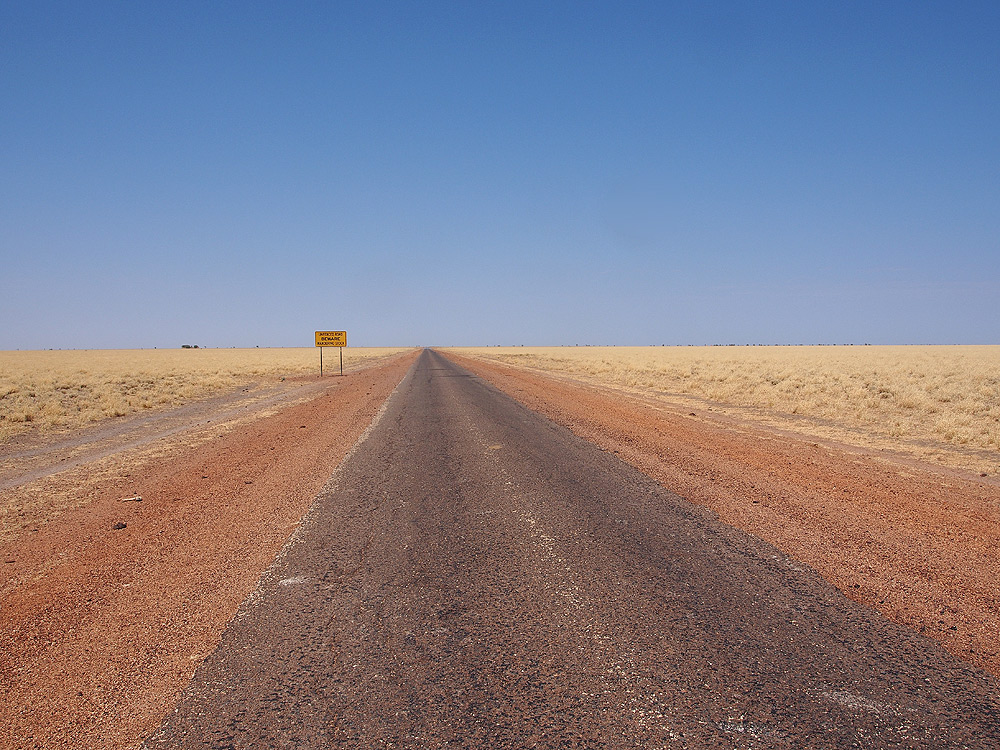
Tablelands Highway (SR11) looking south, 2km south of Cape Crawford. The yellow sign in the background warns drivers that the road is not fenced and to expect stray stock. Source: Peter Renshaw, September 2014. |
 |
Tablelands Highway (SR11) looking north at the turnoff to Balbirini Station, 5km south of Cape Crawford. Source: Peter Renshaw, September 2014. |
 |
Looking south approximately 7km south of Cape Crawford with the 'Lost City' rock formations forming an impressive backdrop. Source: Peter Renshaw, September 2014. |
  |
Views south and then north across the McArthur River crossing, 12km south of Cape Crawford. This crossing consists of a series of 3 low-level, single-lane concrete bridges across the main and flood channels. Source: Peter Renshaw, September 2014. |
 |
Tablelands Highway (SR11) looking north towards the McArthur River crossing with the 'Lost City' in the background, approximately 14km south of Cape Crawford. Source: Peter Renshaw, September 2014. |
 |
Another view north with the first northbound glimpse of the 'Lost City' near Gum Flat Creek, approximately 15km south of Cape Crawford. Source: Peter Renshaw, September 2014. |
 |
View south approximately 20km south of Cape Crawford. The single-lane seal generally only widens for floodways. Source: Peter Renshaw, September 2014. |
 |
View south as you enter a winding section of the highway, approximately 24km south of Cape Crawford. The northern 50km or so of the highway is a significant contrast to the very flat, straight and open road alignment across the Barkly Tableland. Source: Peter Renshaw, September 2014. |
 |
View south through the winding section, approximately 27km south of Cape Crawford. Source: Peter Renshaw, September 2014. |
 |
Fingerboard signs at the turnoff to Mallapunyah Station, 37km south of Cape Crawford. Note the missing SR11 route marker. I also noticed that the distances on signs along this highway seemed to be inconsistent and often out by 2 or 3 kilometres. Source: Peter Renshaw, September 2014. |
 |
Long view south approximately 15km south of Mallapunyah turnoff (52km south of Cape Crawford). Note the dramatic change in terrain as the highway opens up onto the northern edge of the Barkly Tableland. Source: Peter Renshaw, September 2014. |
 |
View north approximately 75km south of Cape Crawford. Source: Peter Renshaw, September 2014. |
 |
View south from the same spot, showing the last of the undulating terrain as you approach the southern crossing of McArthur River. Source: Peter Renshaw, September 2014. |
| View north at the floodway crossing of McArthur River, 81km south of Cape Crawford. The bottom photo show an old NT Department of Transport & Works maintenance marker; the '81.04 km' seems to refer to the distance south from the Carpentaria Highway at Cape Crawford and '72.14km' seems to refer to the junction with Barkly Stock Route at 153km south of Cape Crawford. Source: Peter Renshaw, September 2014. |
|
 |
View south approximately 95km south of Cape Crawford. Peter notes that the sealed surface of the northern 100km or so of the highway was in poor condition and quite rough. Source: Peter Renshaw, September 2014. |
| Back-to-back kilometre plate + trailblazer assembly approximately 107km south of Cape Crawford. Note that these signs indicate that the distance between Cape Crawford and Barkly Homestead is 380km, whereas Google Maps suggests 378km and the previous signage at Mallapunyah turnoff suggested 375km. This sign is actually located approximately 107km south of Cape Crawford. Source: Peter Renshaw, September 2014. |
|
 |
Fingerboard signs at the turnoff to Kiana Station, 108km south of Cape Crawford. Note the inconsistency with the 'CC110' kilometre plate shown in the previous photo. Source: Peter Renshaw, September 2014. |
 |
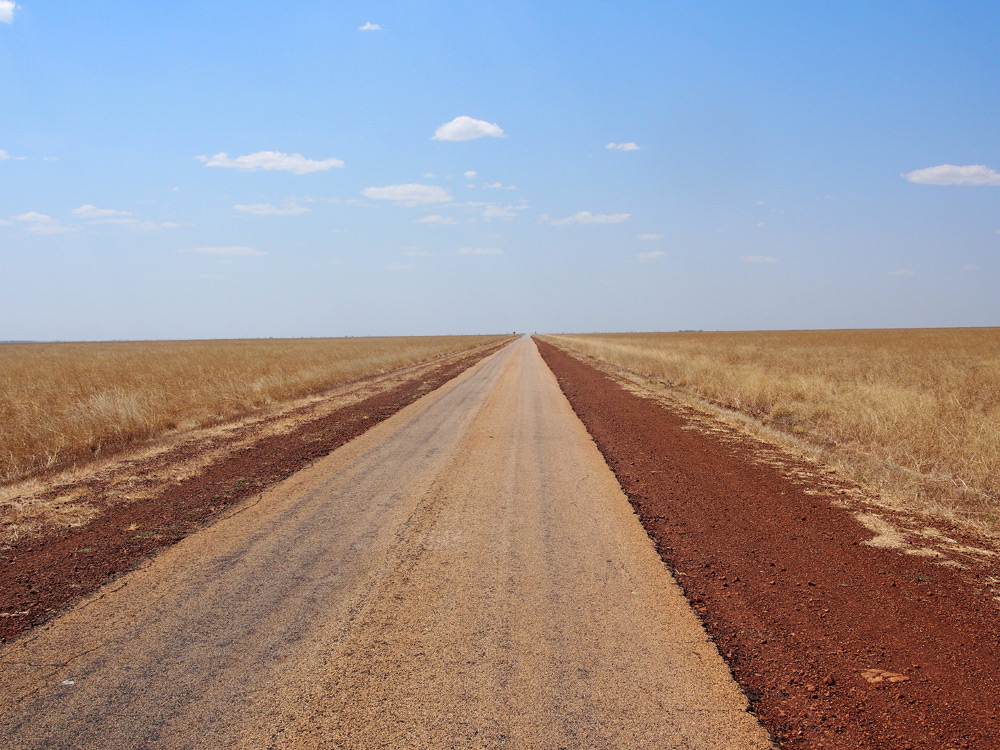
Iridescent red soil, looking south approximately 120km south of Cape Crawford. Source: Peter Renshaw, September 2014. |
 |
View south across the floodway over Cattle Creek, 135km south of Cape Crawford. Source: Peter Renshaw, September 2014. |
 |
Looking south at the turnoff to Walhallow Station, 137km south of Cape Crawford. Source: Peter Renshaw, September 2014. |
 |
Long view north across the Barkly Tableland, approximately 140km south of Cape Crawford. Source: Peter Renshaw, September 2014. |
 |
RD sign northbound on Tablelands Highway (SR11) after the junction with Barkly Stock Route (SR16), 154km south of Cape Crawford. Source: Peter Renshaw, September 2014. |
 |
Southbound AD sign on Tablelands Highway (SR11) approaching the junction with Barkly Stock Route (SR16), 154km south of Cape Crawford. Two errors on this sign - the NHR11 shield should of course be SR11, and SR16 should be shown straight ahead as well. State Route 16 duplexes with State Route 11 for 19km between the Barkly Stock Route and Calvert Road junctions. Source: Peter Renshaw, September 2014. |
 |
ID signs at the junction of Tablelands Highway (SR11) and Barkly Stock Route, 154km south of Cape Crawford. No route markers at all on these signs! Source: Peter Renshaw, September 2014. |
 |
AD sign eastbound on Barkly Stock Route (SR16) approaching the junction with Tablelands Highway (SR11). Again no route numbers on this sign but also note 'Barkly Homestead' instead of 'To Barkly Highway' as the focal point, as well as Calvert Hills which is a cattle station located on the easterly continuation of SR16, Calvert Road. Source: Peter Renshaw, September 2014. |
 |
AD sign northbound on Tablelands Highway (SR11) approaching the junction with Barkly Stock Route (SR16), 154km south of Cape Crawford - one of only two completely correct signs at the junction. Note that 'Barkly' appears to be on a coverplate over a spelling mistake? Source: Peter Renshaw, September 2014. |
 |
RD sign southbound on Tablelands Highway (SR11/SR16) after the junction with Barkly Stock Route (SR16). Note no mention of State Route 16 or Calvert Hills. Source: Peter Renshaw, September 2014. |


Photos of State Route 11 / Tablelands Highway - Creswell Creek to Barkly Homestead |
|
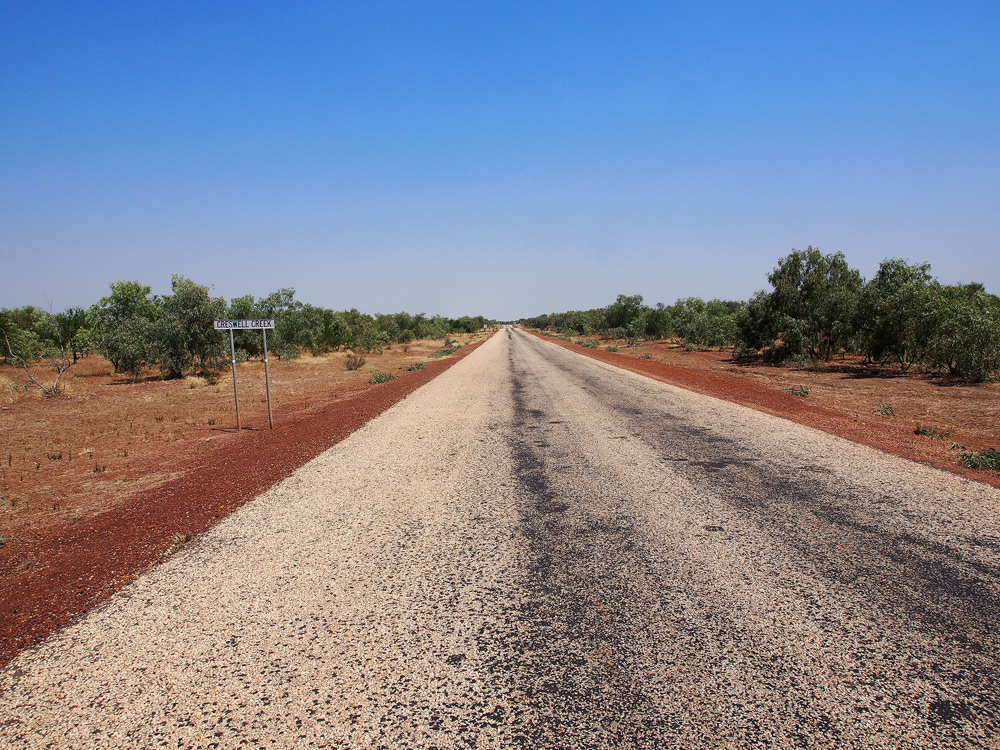  |
Approximately 1km south of Barkly Stock Route, the Tablelands Highway (SR11/SR16) crosses Creswell Creek by a one-lane concrete bridge and a long floodway. These two views look south across the crossing. Source: Peter Renshaw, September 2014. |
 |
Kilometre plate + trailblazer sign assembly on Tablelands Highway (SR11/SR16) approximately 6km south of Barkly Stock Route. Note the omission of SR16. The southbound trailblazer was also missing. Source: Peter Renshaw, September 2014. |
 |
RD sign northbound on Tablelands Highway (SR11/SR16) after the junction with Calvert Road (SR16), 19km south of Barkly Stock Route / 173km south of Cape Crawford. Consistent with the other signs in this area, the SR11/SR16 duplex is not signed. Source: Peter Renshaw, September 2014. |
 |
AD sign southbound on Tablelands Highway (SR11/SR16) approaching the junction with Calvert Road (SR16), 173km south of Cape Crawford. Note that this sign refers to 'Wollogorang Road' as the focal point, whereas the northbound AD sign refers to just 'Wollogorang'. The 'Alternate Route' legend is also a bit confusing as there is no sealed route all the way to Wollogorang. Source: Peter Renshaw, September 2014. |
  |
ID sign assembly at the junction of Tablelands Highway & Calvert Road, 173km south of Cape Crawford. Note the omission of State Route 16 from all signage at the actual junction. There was also no AD sign on Calvert Road approaching the junction. Source: Peter Renshaw, September 2014. |
 |
AD sign northbound on Tablelands Highway (SR11) approaching the junction with Calvert Road (SR16), 173km south of Cape Crawford. Note the focal point is 'Wollogorang' rather than 'Wollogorang Road' as shown on the southbound AD sign. Source: Peter Renshaw, September 2014. |
 |
RD sign southbound on Tablelands Highway (SR11) after the junction with Calvert Road (SR16). Only 204km to go until the Barkly Highway is reached at Barkly Homestead. Source: Peter Renshaw, September 2014. |
 |
One of the hazards of travel in the Barkly Tableland - unfenced stock. Looking north approximately 198km south of Cape Crawford. Source: Peter Renshaw, September 2014. |
 |
Typical view south approximately 203km south of Cape Crawford. Source: Peter Renshaw, September 2014. |
 |
View south at the turnoff to Corella Creek Aboriginal Community approximately 212km south of Cape Crawford. Source: Peter Renshaw, September 2014. |
 |
View south across the Corella Creek floodway, 213km south of Cape Crawford. Source: Peter Renshaw, September 2014. |
 |
RD sign northbound on Tablelands Highway (SR11) after the junction with Ranken Road, 235km south of Cape Crawford. Source: Peter Renshaw, September 2014. |
 |
AD sign southbound on Tablelands Highway (SR11) approaching the junction with Ranken Road, 235km south of Cape Crawford. As the sign suggests, Ranken Road is an alternative route to Barkly Highway for traffic heading towards Mt Isa, however you will need another 300+km worth of fuel as there are no services on this route until Camooweal. Source: Peter Renshaw, September 2014. |
  |
ID signs at the junction of Tablelands Highway (SR11) & Ranken Road. Note the ID sign facing northbound traffic is missing - most likely stolen. Source: Peter Renshaw, September 2014. |
  |
AD and RD signs on Ranken Road, immediately east of Tablelands Highway. Note that both signs refer to 'Barkly Hwy' rather than 'To Barkly Hwy'; the latter seemingly the standard in the NT. Source: Peter Renshaw, September 2014. |
 |
An a bomination of an AD sign, northbound on Tablelands Highway (SR11) approaching Ranken Road. This sign makes no sense and has an incorrect route marker to top it off. Source: Peter Renshaw, September 2014. |
 |
RD sign southbound on Tablelands Highway (SR11) after the junction with Ranken Road. Only 142km to go until Barkly Homestead. Source: Peter Renshaw, September 2014. |
 |
Fingerboard sign at the turnoff to Brunette Downs Station, 248km south of Cape Crawford. Source: Peter Renshaw, September 2014. |
 |
Tablelands Highway looking north towards the Brunette Downs turnoff, 248km south of Cape Crawford. Source: Peter Renshaw, September 2014. |
  |
Views south and then north across Brunette Creek, 250km south of Cape Crawford. The crossing consists of a series of three small concrete bridges and a long floodway. Source: Peter Renshaw, September 2014. |
 |
Looking south towards the small concrete bridge over White Hole Creek, 272km south of Cape Crawford. Source: Peter Renshaw, September 2014. |
  |
Between White Hole and Boree Creeks is a section of two-lane sealed highway, providing a rare opportunity for light vehicles to overtake slower moving traffic (e.g. road trains, caravans). This is one of two locations along the Tablelands Highway. Source: Peter Renshaw, September 2014. |
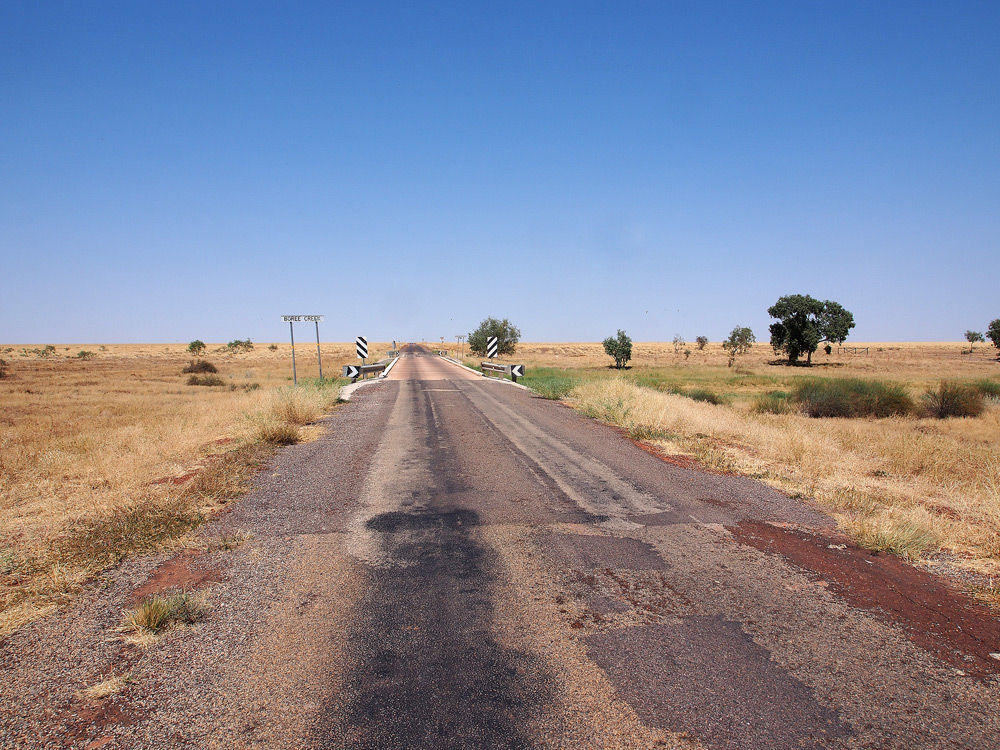 |
View south at Boree Creek, 277km south of Cape Crawford, showing deterioriating road surface. Source: Peter Renshaw, September 2014. |
 |
View south at Kennedy Creek, 295km south of Cape Crawford. Source: Peter Renshaw, September 2014. |
 |
View north approximately 297km south of Cape Crawford. Note the use of the standard 'Overtaking Lane' sign to refer to a short section of two-lane seal. Source: Peter Renshaw, September 2014. |
 |
View south approximately 310km south of Cape Crawford. The yellow sign in the middle ground is another warning about the unfenced road. Source: Peter Renshaw, September 2014. |
 |
Another view south, this time approximately 315km south of Cape Crawford. Flat, featureless plains and a seemingly random bend in the highway. Source: Peter Renshaw, September 2014. |
 |
Looking south to the bridge over Playford River near Alroy cattle station, 323km south of Cape Crawford. Some of its residents have taken up camp by the river to enjoy what remains of the wet season. Source: Peter Renshaw, September 2014. |
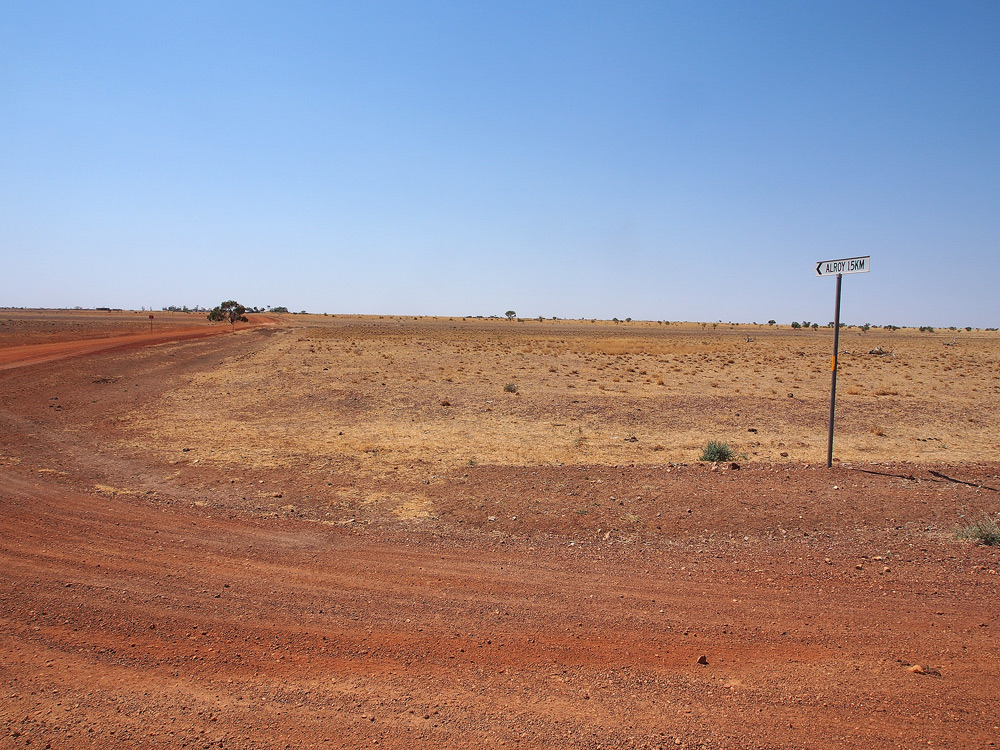
Fingerboard sign and a view north at the turnoff to Alroy Station, 324km south of Cape Crawford. Source: Peter Renshaw, September 2014. |
|
 |
Long view north towards Alroy Station, approximately 328km south of Cape Crawford. Source: Peter Renshaw, September 2014. |
 |
A rare bend in the highway - looking south approximately 338km south of Cape Crawford. Source: Peter Renshaw, September 2014. |
  |
Back-to-back kilometre plates, 30km north of Barkly Homestead (although the 'BH' stands for 'Barkly Hwy') and 348km south of Cape Crawford. I wonder if all these back-to-back kilometres were intended to be 'close enough is good enough' or whether they were installed in error. Source: Peter Renshaw, September 2014. |
 |
Unfenced Road / Wandering Stock signage, northbound on Tablelands Highway approximately 10km north of Barkly Homestead / 368km south of Cape Crawford. Even the outback has its practical jokers. Source: Peter Renshaw, September 2014. |
 |
View south on Tablelands Highway approximately 5km north of Barkly Homestead / 373km south of Cape Crawford. Source: Peter Renshaw, September 2014. |
 |
Advance Direction sign southbound on Tablelands Highway (SR11) approaching the junction with Barkley Highway (NHR66) at Barkly Homestead. Note the use of 'To Stuart Highway' as the focal point, rather than the relatively large town of Tennant Creek which is located near the Barkly/Stuart junction. Source: Peter Renshaw, September 2014. |
The series of signs which faces northbound traffic on Tablelands Highway (SR11) as you leave the junction with Barkly Highway (NHR66). I note that the green Reassurance Direction sign shown in the 3rd photo was missing when Peter went through in September 2014 and is still missing as at May 2018. |
|
   |
Intersection Direction signs at the junction of Barkly Highway (NHR66) & Tablelands Highway (SR11) outside the Barkly Homestead roadhouse. Amazingly for this part of the world, all 3 signs have the correct focal points and route markers. Source: Peter Renshaw, September 2014. |
  |
Old and new Advance Direction signs eastbound on Barkly Highway (NHR66) approaching the junction with Tablelands Highway (SR11) at Barkly Homestead. Neither the old or new sign managed to have the correct route marker and also note the inconsistent focal points compared to the ID signage. Top photo: NT Government, August 2010. Bottom photo : Peter Renshaw, September 2014. |
 |
AD sign westbound on Barkly Highway (NHR66) approaching the junction with Tablelands Highway (SR11). Note the missing route numbers and inconsistent focal points. Also note the signing of an alternative route to Darwin via Tablelands and Carpentaria Highways. Source: Peter Renshaw, September 2014. |
 |
Plaque at the junction of Barkly & Tablelands Highways, commemorating the official opening of the 'The Tableland Highway' on 21th December, 1970. Source: Peter Renshaw, September 2014. |


Last updated 21 July 2018 © Ozroads 2003-2018. |