NSW Route B59 Bells Line of Road |

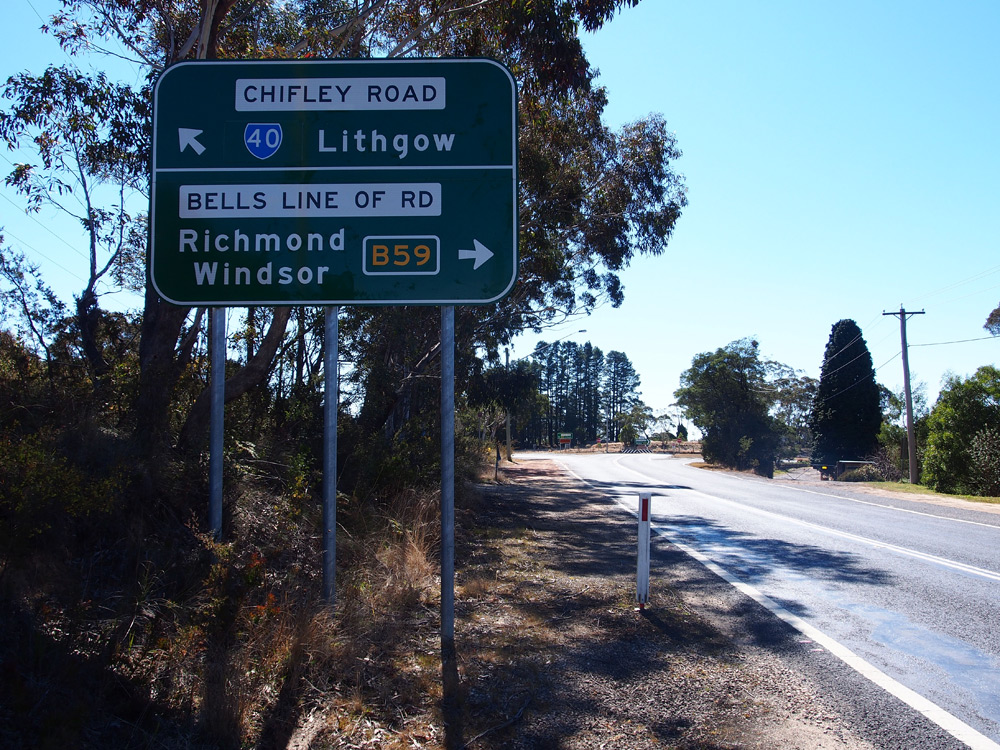
RD sign eastbound on Bells Line of Road after the junction with Comleroy Road, Kurrajong. Source: Michael Durrant, August 2013.
Introduced: May-June 2013
Replaced: State Route 40 (Windsor to Lithgow portion)
Length: 87km
Eastern Terminus: Macquarie Street & Hawkesbury Valley Way, Windsor
Western Terminus: Great Western Highway & Main Street, Lithgow
Route taken: Hawkesbury Valley Way, Windsor Street, East Market Street, March Street, Kurrajong Road, Bells Line of Road, Chifley Road, Mort Street, Lithgow Street, Main Street
Focal Points: (Sydney), Windsor, Richmond (westbound only), Lithgow
Roads Act 1993 classification: Main Road No. 184
Notable Events:
August 2011 - first uncovered B59 signs spotted by Ben Zoffman
September 2012 - Alpha-numeric route marking scheme announced by RMS
May-June 2013 - route B59 signposted
Description:
Route B59 is a radial route extending west from Sydney. It is one of only two crossings of Blue Mountains, playing a vital role in connecting the Sydney Basin with Central Western New South Wales. B59 replaces the portion of former State Route 40 between Windsor and Lithgow.
At present there is a ridiculous situation where B59 terminates at A9 Macquarie Street in Windsor. Motorists navigating by route numbers would be encourage to follow A9 into Windsor, then A2 through McGraths Hill to head further east, whilst the direct eastern continuation of Hawkesbury Valley Way is signed for Sydney but remains unnumbered. This situation is equally applicable for westbound traffic. RMS advised in 2013 that they will be considering the extension of B59 as part of a possible 'Stage 2' alpha-numeric scheme - let's hope this happens sooner rather than later.
History:
Coming soon...
Signage:
The vast majority of signs along the route date from the period 2009-2012 and therefore include the B59 route marker. Coverplates were only considered necessary on a handful of signs including, strangely, ID signs installed in 2007 at Macquarie Street, Windsor.
|
Photos of route B59 - Windsor to North Richmond |
|
 |
AD sign southbound on Macquarie Street approaching the junction with Hawkesbury Valley Way, Windsor. This is the current eastern terminus of B59 but hopefully not for long - it should, of course, be extended east along Hawkesbury Valley Way and Groves Avenue to meet A2 Windsor Road at Vineyard. Photo taken: September 2013. |
 |
AD sign westbound on Hawkesbury Valley Way approaching the junction with Macquarie Street, Windsor. Photo taken: September 2013. |
 |
AD sign northbound on Macquarie Street approaching the junction with Hawkesbury Valley Way, Windsor. Photo taken: September 2013. |
  |
Poorly coverplated ID signs at the junction of Macquarie Street & Hawkesbury Valley Way, Windsor. These signs were installed in 2007 when Hawkesbury Valley Way was named but for some strange reason did not include the B59 route marker. Photo taken: September 2013. |
 |
AD sign eastbound on Hawkesbury Valley Way approaching the eastern terminus of B59 at Macquarie Street, Windsor. Hopefully B59 will be extended east from this point to meet A2 Windsor Road at Vineyard. Photo taken: September 2013. |
  |
ID signs at the junction of Hawkesbury Valley Way & George Street, Windsor. Note the absence of a route marker - either B59 or A9 - on the east-pointing sign. Photo taken: September 2013. |
 |
AD sign eastbound on Hawkesbury Valley Way approaching the junction with George Street, Windsor. Photo taken: September 2013. |
 |
Hawkesbury Valley Way looking east into Windsor at Rum Corp Lane. Photo taken: September 2013. |
 |
RD sign westbound on Hawkesbury Valley Way as you leave Windsor and cross Rickabys Creek. Photo taken: September 2013. |
 |
AD sign westbound on Hawkesbury Valley Way approaching the turnoff to RAAF Base Richmond at Percival Street, Clarendon. Photo taken: September 2013. |
 |
ID sign at the junction of Hawkesbury Valley Way & Percival Street, Clarendon. Photo taken: September 2013. |
 |
AD sign eastbound on Hawkesbury Valley Way approaching the turnoff to RAAF Base Richmond at Percival Street, Clarendon. Photo taken: September 2013. |
 |
Hawkesbury Valley Way looking west alongside RAAF Base Richmond from near the above sign. Photo taken: September 2013. |
 |
RD sign eastbound on Hawkesbury Valley Way on the eastern edge of Richmond. RAAF Base Richmond is behind the fence on the left. Photo taken: September 2013. |
 |
A remnant Tourist Drive 6 trailblazer eastbound on Windsor Street near Pitt Street, Richmond. This relic probably dates from the Council-based tourist drives of the 1980s which are no longer maintained or promoted. Photo taken: September 2013. |
 |
Windsor Street looking east from the junction with East Market Street, Richmond, with the old Regent Theatre in view. |
  |
ID signs at the junction of Windsor Street & East Market Street, Richmond. |
 |
AD sign southbound on East Market Street approaching the junction with March Street, Richmond. |
   |
ID signs at the junction of East Market & March Streets, Richmond. |
 |
AD sign northbound on East Market Street approaching the junction with March Street, Richmond. Photo taken: September 2013. |
 |
AD sign eastbound on March Street approaching the junction with East Market Street, Richmond. Source: Peter Renshaw, August 2013. |
 |
AD sign westbound on March Street approaching the junction with Bosworth Street, Richmond. Note the reference to Kurrajong Road - this is one block early as March Street continues to the edge of Richmond townsite at Chapel Street. Source: Peter Renshaw, August 2013. |
  |
ID signs at the junction of March Street & Bosworth Street, Richmond. Note the reference to Kurrajong Road - this is one block early as March Street continues to the edge of Richmond townsite at Chapel Street. Source: Peter Renshaw, August 2013. |
 |
AD sign eastbound on March Street approaching the junction with Bosworth Street, Richmond. Source: Peter Renshaw, August 2013. |
 |
March Street looking west towards Chapel Street, Richmond. Source: Peter Renshaw, August 2013. |
 |
RD sign westbound on Kurrajong Road after the junction with Chapel Street, Richmond. Source: Peter Renshaw, August 2013. |
 |
ID signs at the junction of Bells Line of Road, Terrace Road & Grose Vale Road, North Richmond. Source: Peter Renshaw, August 2013. |
Photos of B59 - North Richmond to Kurrajong Heights |
|
 |
ID sign at the junction of Bells Line of Road & Kurmond Road, Kurmond. Source: Peter Renshaw, August 2013. |
 |
RD sign eastbound on Bells Line of Road after the junction with Comleroy Road, Kurrajong. Source: Michael Durrant, August 2013. |
 |
Diagrammatic AD sign westbound on Bells Line of Road approaching the junctions with Comleroy Road & Old Bells Line of Road, Kurrajong. Source: Peter Renshaw, August 2013. |
 |
AD sign westbound on Bells Line of Road approaching the junction with Comleroy Road, Kurrajong. Source: Peter Renshaw, August 2013. |
  |
ID signs at the junction of Bells Line of Road & Comleroy Road, Kurrajong. Source: Peter Renshaw, August 2013. |
 |
AD sign eastbound on Bells Line of Road approaching the junction with Comleroy Road, Kurrajong. Source: Peter Renshaw, August 2013. |
 |
AD sign westbound on Bells Line of Road approaching the junction with Old Bells Line of Road & Mill Road, Kurrajong. Source: Peter Renshaw, August 2013. |
 |
AD sign northbound on Old Bells Line of Road approaching the junction with Bells Line of Road, Kurrajong. Source: Peter Renshaw, August 2013. |
   |
ID signs at the junction of Bells Line of Road, Old Bells Line of Road & Mill Road, Kurrajong. Source: Peter Renshaw, August 2013. |
 |
RD sign westbound on Bells Line of Road after the junction with Old Bells Line of Road, Kurrajong. Source: Peter Renshaw, August 2013. |
 |
ID sign at the junction of Bells Line of Road & Old Bells Line of Road (west), 1km west of Kurrajong. Source: Peter Renshaw, August 2013. |
 |
AD sign eastbound on Bells Line of Road approaching the junction with Old Bells Line of Road, 1km west of Kurrajong. Source: Peter Renshaw, August 2013. |
Photos of B59 - Bilpin to Bell |
|
  |
ID signs at the junction of Bells Line of Road & Mountain Lagoon Road, Bilpin. It's disappointing that a fingerboard sign is provided for Mountain Lagoon Road but not for the B59 - distances would be very handy at this point. Source: Peter Renshaw, August 2013. |
 |
RD sign eastbound on Bells Line of Road near the Blue Mountains Botanic Gardens, 48km west of Windsor. Source: Peter Renshaw, August 2013. |
 |
ID sign at the junction of Bells Line of Road & Old Bells Line of Road (entrance to Blue Mountains Botanic Gardens), Mt Tomah. Source: Peter Renshaw, August 2013. |
 |
RD sign westbound on Bells Line of Road after Mt Tomah Botanic Gardens, approaching Skyline Road. Source: Peter Renshaw, August 2013. |
 |
Combined warning and advance direction sign westbound on Bells Line of Road approaching the junction with Skyline Road, Mt Tomah. Source: Peter Renshaw, August 2013. |
 |
RD sign eastbound on Bells Line of Road after the junction with Mt Wilson Road, 7km east of Bell. Source: Peter Renshaw, August 2013. |
 |
AD sign westbound on Bells Line of Road approaching the junction with Mt Wilson Road, 7km east of Bell. Source: Peter Renshaw, August 2013. |
 |
ID and fingerboard signs at the junction of Bells Line of Road & Mt Wilson Road, 7km east of Bell. Source: Peter Renshaw, August 2013. |
 |
AD sign eastbound on Bells Line of Road approaching the junction with Mt Wilson Road, 7km east of Bell. Source: Michael Durrant, August 2013. |
Photos of B56 - Bell to Lithgow |
|
 |
RD sign eastbound on Bells Line of Road after the Heavy Vehicle Checking Station at Bell. Source: Peter Renshaw, August 2013. |
 |
Looking west from the Heavy Vehicle Checking Station at Bell towards the junction with Darling Causeway & Chifley Road. Source: Peter Renshaw, August 2013. |
    |
ID signs at the junction of Bells Line of Road, Chifley Road & Darling Causeway, Bell. Top photo: Michael Durrant, August 2013. Remaining 3 photos: Peter Renshaw, August 2013. |
 |
AD sign northbound on Darling Causeway approaching the junction with Bells Line of Road & Chifley Road, Bell. Note the remaining State Route 40 coverplate which was removed by the end of 2013. Source: Peter Renshaw, August 2013. |
 |
AD sign eastbound on Chifley Road approaching the junction with Bells Line of Road & Darling Causeway, Bell. Source: Peter Renshaw, August 2013. |
 |
RD sign westbound on Chifley Road after the junction with Bells Line of Road & Darling Causeway, Bell. Source: Peter Renshaw, August 2013. |
 |
Coverplated AD sign westbound on Chifley Road approaching the junction with Old Bells Line of Road & Petra Road, Clarence. The blank coverplate covers the legend 'Zig Zag Railway' which is currently closed (as at February 2014). Source: Peter Renshaw, August 2013. |
 |
ID sign at the junction of Chifley Road, Old Bells Line of Road & Petra Road, Clarence. Source: Peter Renshaw, August 2013. |
 |
AD sign eastbound on Chifley Road approaching the junction with Old Bells Line of Road & Petra Road, Clarence. The blank coverplate covers the legend 'Zig Zag Railway' which is currently closed (as at February 2014). Source: Peter Renshaw, August 2013. |
 |
Coverplated RD sign eastbound on Bells Line of Road after the junction with the old access road to Zig Zag Railway at Mt Sinai. I am surprised that this sign, and its partner in the other direction, were updated and not removed. Source: Peter Renshaw, August 2013. |
 |
New RD sign eastbound on Bells Line of Road after the junction with the old access road to Zig Zag Railway at Mt Sinai. I am surprised that this sign, and its partner in the other direction, were updated and not removed. Source: Peter Renshaw, August 2013. |
 |
RD sign eastbound on Chifley Road approaching the start of the climb up Scenic Hill, Corney Town (Lithgow). Note the 'Bells Line of Road' name plate - this section of road is often referred to as part of Bells Line of Road, however that road actually terminates at Bell. Source: Michael Durrant, August 2013. |
 |
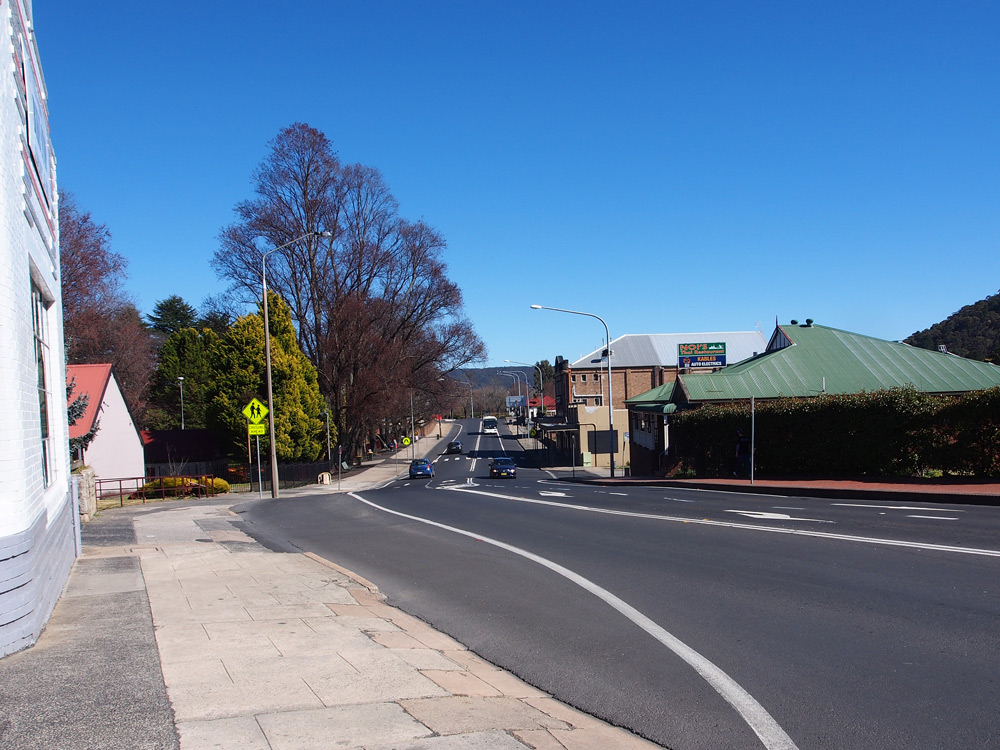
Mort Street looking west towards the junction with Lithgow Street, Lithgow. B59 does a quick dog-leg from Mort Street to Main Street via Lithgow Street at the western end of Lithgow CBD. Source: Peter Renshaw, August 2013. |
  |
ID signs at the junction of Lithgow & Mort Streets, Lithgow. Source: Peter Renshaw, August 2013. |
  |
ID signs at the junction of Lithgow & Main Streets, Lithgow. Source: Peter Renshaw, August 2013. |
 |
Main Street looking west from the junction with Lithgow Street, Lithgow. Source: Peter Renshaw, August 2013. |
 |
AD sign eastbound on Main Street approaching the junction with Lithgow Street, Lithgow. Source: Peter Renshaw, August 2013. |
 |
RD sign eastbound on Main Street near the junction with Great Western Highway, Lithgow. Source: Peter Renshaw, August 2013. |
 |
ID signs at the junction of Great Western Highway & Main Street, Lithgow. Source: Peter Renshaw, August 2013. |
 |
AD sign southbound on Great Western Highway approaching the junction with Main Street, Lithgow. As at the end of 2013, the A32 route marker had yet to be uncovered. Source: Peter Renshaw, August 2013. |
 |
AD sign southbound on Great Western Highway approaching the junction with Main Street, Lithgow. As at the end of 2013, the A32 route marker had yet to be uncovered. Source: Peter Renshaw, August 2013. |
Last updated 22 February 2014 © Ozroads 2003-2014. |