NSW Route B76 Grafton - Moree - Bourke |
RD sign westbound on Gwydir Highway as you leave Inverell. Source: Peter Renshaw, September 2013.
Introduced: April-May 2013
Replaced: National Route 38 (South Grafton to near Walgett) and National Route 37 (Walgett to Bourke)
Length: 810km
Eastern Terminus: Pacific Highway & Gwydir Highway, South Grafton
Western Terminus: Mitchell Highway (Mitchell Street/Warraweena Street) & Kamilaroi Highway (Mitchell Street), Bourke
Route taken: Gwydir Highway from South Grafton to the junction with Castlereagh Highway, 14km north of Walgett (including Charles Street and Ryan Street through South Grafton; Meade Street, Church Street/New England Highway and Ferguson Street through Glen Innes; Glen Innes Road, Otho Street, Byron Street and Warialda Road through Inverell; Inverell Street through Delungra; Inverell Road and Geddes Street through Warialda; Bingara Road, Alice Street, Cross Street, Newell Highway, Boggabilla Road, Balo Street, Heber Street, Greenbah Road; and Wilson Street and Herbert Street through Collarenebri), then Castlereagh Highway from Gwydir Highway to Walgett (including Fox Street through Walgett), then Kamilaroi Highway from Walgett to Bourke (including Wee Waa Street through Walgett; Bridge Road, Belmore Street and Bathurst Street through Brewarrina; and Mitchell Street through Bourke)
Duplexes: A15 at Glen Innes; A39 at Moree; and B55 near Walgett
Focal Points: Grafton, Glen Innes, Inverell, Warialda, Moree, Collarenebri, Walgett, Brewarrina, Bourke
Roads Act 1993 classification: Highway No. 12 (Gwydir Highway sections), Highway No. 9 (New England Highway section), Highway No. 17 (Newell Highway section), Highway No. 18 (Castlereagh Highway section), Highway No. 29 (Kamilaroi Highway section)
Notable Events:
April 2006 - first uncovered B76 signs spotted in Walgett
September 2012 - Alpha-numeric route marking scheme announced by RMS
April-May 2013 - route B76 signposted
Description:
Route B76 is a lengthy east-west route in northern New South Wales, stretching over 800km between the Pacific Highway at Grafton and Mitchell Highway at Bourke. It is a combination of two former National Routes: 37 and 38.
History:
Coming soon...
Signage:
The vast majority of signs along the route pre-dated the preparations for alpha-numeric route marking and accordingly have been adorned with coverplates and/or topknots during the initial signposting of the route.
Several key sections of alpha-numeric ready signage can be found at Glen Innes, Walgett to Brewarrina and Bourke. Extensive new signage was also erected at Moree when B76 was diverted from Heber and Balo Streets to Coolibah Street and Gwydir Streets in late 2013.
- South Grafton to Glen Innes
- Glen Innes to Inverell
- Inverell to Warialda
- Warialda to Moree
- Moree to Collarenebri
- Collarenebri to Walgett
- Walgett to Brewarrina
- Brewarrina to Bourke
|
Photos of route B76 - South Grafton to Glen Innes |
|
 |
AD sign northbound on Pacific Highway (Schwinghammer Street) approaching the junction with Gwydir Highway (Charles Street), South Grafton. Source: Peter Renshaw, August 2013. |
 |
AD sign southbound on Pacific Highway (Charles Street) approaching the junction with Gwydir Highway (Charles Street), South Grafton. Source: Peter Renshaw, August 2013. |
   |
ID sign assemblies at the junction of Pacific Highway (Charles Street/Schwinghammer Street) & Gwydir Highway (Charles Street), South Grafton. Note that the Tourist Drive sign is not a camera malfunction - the reflective material has deteriorated unusually. Source: Peter Renshaw, August 2013. |
 |
AD sign westbound on Gwydir Highway (Charles Street) approaching the junction with Summerland Way (Bent Street), South Grafton. Source: Peter Renshaw, August 2013. |
 |
AD sign northbound on Bent Street approaching the junction with Gwydir Highway (Charles Street/Ryan Street), South Grafton. Note the remnant National Route 1 and State Route 91 route markers. Source: Peter Renshaw, August 2013. |
 |
Westbound ID sign at the junction of Gwydir Highway (Charles Street/Ryan Street) & Summerland Way (Bent Street), South Grafton. Source: Peter Renshaw, August 2013. |
 |
AD sign eastbound on Gwydir Highway (Ryan Street) approaching the junction with Summerland Way (Bent Street), South Grafton. Note the remnant National Route 1 shield. Source: Peter Renshaw, August 2013. |
Gwydir Highway (Ryan Street) looking east into South Grafton. Source: Peter Renshaw, August 2013. |
|
 |
Coverplated RD sign westbound on Gwydir Highway (Ryan Street) as you leave South Grafton. Source: Peter Renshaw, August 2013. |
 |
Dodgy AD sign westbound on Gwydir Highway approaching the junction with Rogan Bridge Road, 7km west of Grafton. Despite what this sign says, the road to the right is not, in fact, the Gwydir Highway. Source: Peter Renshaw, August 2013. |
Fingerboard sign assembly at the junction of Gwydir Highway & Rogan Bridge Road, 7km west of Grafton. Note the possible spelling mistake on the sign - official NSW Government maps show the road name as 'Rogan Bridge Road' not 'Rogans Bridge Road. Source: Peter Renshaw, August 2013. |
|
 |
AD sign eastbound on Gwydir Highway approaching the junction with Rogan Bridge Road, 7km west of Grafton. Source: Peter Renshaw, August 2013. |
AD sign westbound on Gwydir Highway approaching the junction with Old Glen Innes Road, 8km west of Grafton. As the name would suggest, Old Glen Innes Road is the old highway route from Grafton to Glen Innes which was replaced by the present Gwydir Highway in 1960. Source: Peter Renshaw, August 2013. |
|
 |
Fingerboard sign assembly at the junction of Gwydir Highway & Old Glen Innes Road, 8km west of Grafton. Source: Peter Renshaw, August 2013. |
 |
AD sign eastbound on Gwydir Highway approaching the junction with Old Glen Innes Road, 8km west of Grafton. Source: Peter Renshaw, August 2013. |
 |
Longer view eastbound on Gwydir Highway towards Old Glen Innes Road, 8km west of Grafton. |
 |
Dodgy fingerboard sign assembly at the junction of Gwydir Highway & Tindal Road, 15km west of Grafton. |
 |
Dodgy fingerboard sign assembly - missing B76 - at the junction of Gwydir Highway & the ominously named Purgatory Creek Road, 34km west of Grafton. |
 |
Fingerboard sign assembly at the junction of Gwydir Highway & Mann River Road, Jackadgery. |
 |
Fingerboard sign assembly at the junction of Gwydir Highway & Cangai Road, Jackadgery. Source: Peter Renshaw, August 2013. |
 |
A view west through the junction with Cangai Road showing the high-level Jackadgery Bridge over the Mann River at Jackadgery. Source: Peter Renshaw, August 2013. |
A northerly view towards the high-level Jackadgery Bridge carrying the Gwydir Highway over the Mann River at Jackadgery. Source: Peter Renshaw, August 2013. |
|
  |
Two views of the dodgy fingerboard signs at the junction of Gwydir Highway & Cangai Bridge Road, 62km west of Grafton. Source: Peter Renshaw, August 2013. |
 |
More dodgy fingerboard signs - this time at the junction of Gwydir Highway & Coombadjha Road, 63km west of Grafton. Source: Peter Renshaw, August 2013. |
 |
A westbound view towards the bridge over Bellbird Creek with the imposing Gibraltar Range in the background, approximately 66km west of Grafton. Source: Peter Renshaw, August 2013. |
 |
Gwydir Highway looking west at the bottom of the Gibraltar Range, approximately 67km west of Grafton. Source: Peter Renshaw, August 2013. |
  |
Fingerboard signage at the junction of Gwydir Highway & Washpool Forest Way near Summit Mountain, 85km west of Grafton. Source: Peter Renshaw, August 2013. |
 |
Fingerboard sign assembly at the junction of Gwydir Highway & Mulligans Drive, 92km west of Grafton. Source: Peter Renshaw, August 2013. |
 |
Fingerboard sign assembly at the junction of Gwydir Highway & Old Grafton Road, 35km east of Glen Innes/126km west of Grafton. This is the western end of the former highway route previously encountered at Old Glen Innes Road. Source: Peter Renshaw, August 2013. |
 |
Looking west along Gwydir Highway through the junction with Old Grafton Road, 35km east of Glen Innes. Source: Peter Renshaw, August 2013. |
 |
Fingerboard sign assembly at the junction of Gwydir Highway & Glen Elgin Road, 34km east of Glen Innes. Source: Peter Renshaw, August 2013. |
 |
Fingerboard sign assembly looking east at the junction of Gwydir Highway & Shannon Vale Road, 27km east of Glen Innes. Source: Peter Renshaw, August 2013. |
 |
Dodgy AD sign, missing the B76 route marker, westbound on Gwydir Highway approaching the junction with Bald Nob Road, 25km east of Glen Innes. This road provides a short cut for traffic heading north along the New England Highway. Source: Peter Renshaw, August 2013. |
 |
Fingerboard sign assembly at the junction of Gwydir Highway & Bald Nob Road, 25km east of Glen Innes. Source: Peter Renshaw, August 2013. |
 |
Dodgy fingerboard sign assembly at the junction of Gwydir Highway & Golf Links Road, 4km east of Glen Innes. Source: Peter Renshaw, August 2013. |
 |
An easterly view through the intersection of Gwydir Highway & Golf Links Road, 4km east of Glen Innes. Source: Peter Renshaw, August 2013. |
 |
Unusual brown RD sign eastbound on Gwydir Highway on the eastern outskirts of Glen Innes. Note the National Route 38 route marker which was missed in the initial B76 rollout. Source: Peter Renshaw, August 2013. |
 |
AD sign westbound on Gwydir Highway (Meade Street) approaching the junction with New England Highway (Church Street), Glen Innes. B76 follows a short section of New England Highway before turning west onto the second section of Gwydir Highway. Source: Peter Renshaw, August 2013. |
 |
AD sign northbound on New England Highway (Church Street) approaching the junction with Gwydir Highway (Meade Street), Glen Innes. Source: Peter Renshaw, August 2013. |
   |
ID signs at the junction of New England Highway (Church Street) & Gwydir Highway (Meade Street), Glen Innes. Source: Peter Renshaw, August 2013. |
 |
AD sign southbound on New England Highway (Church Street) approaching the junction with Gwydir Highway (Meade Street), Glen Innes. Source: Peter Renshaw, August 2013. |
 |
AD sign northbound on New England Highway (Church Street) approaching the junction with Gwydir Highway (Ferguson Street), Glen Innes. Source: Peter Renshaw, August 2013. |
  |
ID signs at the junction of New England Highway (Church Street) & Gwydir Highway (Ferguson Street), Glen Innes. Source: Peter Renshaw, August 2013. |
 |
AD sign eastbound on Gwydir Highway (Ferguson Street) approaching the junction with New England Highway (Church Street), Glen Innes. Source: Peter Renshaw, August 2013. |
 |
Fading 'End Tourist Drive 11' sign eastbound on Gwydir Highway (Ferguson Street) approaching the junction with Grey Street, Glen Innes. Source: Peter Renshaw, August 2013. |
 |
ID signs facing eastbound traffic at the junction of Gwydir Highway (Ferguson Street) & Grey Street, Glen Innes. Source: Peter Renshaw, August 2013. |
 |
Coverplated ID sign at the junction of Gwydir Highway (Ferguson Street) & Lambeth Street, Glen Innes. Source: Peter Renshaw, August 2013. |
 |
AD sign westbound on Gwydir Highway (Ferguson Street) approaching the junction with Coronation Avenue, Glen Innes. Source: Peter Renshaw, August 2013. |
  |
ID signs at the junction of Gwydir Highway (Ferguson Street) & Coronation Avenue, Glen Innes. Note the missing B76 route markers. Source: Peter Renshaw, August 2013. |
 |
AD sign southbound on Coronation Avenue approaching the junction with Gwydir Highway (Ferguson Street), Glen Innes. Note the badly faded tourist drive sign and the remnant National Route 38 shield which was missed in the initial B76 rollout. Source: Peter Renshaw, August 2013. |
 |
AD sign eastbound on Gwydir Highway (Ferguson Street) approaching the junction with Coronation Avenue, Glen Innes. Source: Peter Renshaw, August 2013. |
 |
RD sign westbound on Gwydir Highway as you leave Glen Innes. Source: Peter Renshaw, August 2013. |


Photos of B76 - Glen Innes to Inverell |
|
 |
Fingerboard sign assembly at the junction of Gwydir Highway & Tuttles Lane, 3km west of Glen Innes. Tuttles Lane is a connecting link to the Glen Innes-Bonshaw road. Source: Peter Renshaw, September 2013. |
 |
Gwydir Highway looking east from near West Furracabad Road, 5km west of Glen Innes. Source: Peter Renshaw, September 2013. |
 |
Fingerboard sign assembly at the junction of Gwydir Highway & West Furracabad Road, 5km west of Glen Innes. Source: Peter Renshaw, September 2013. |
 |
Fingerboard sign at the junction of Gwydir Highway & Beaufort Road, 9km west of Glen Innes. Source: Peter Renshaw, September 2013. |
 |
Fingerboard sign assembly at the junction of Gwydir Highway & Waterloo Road, 19km west of Glen Innes. Source: Peter Renshaw, September 2013. |
 |
Looking west along Gwydir Highway from Waterloo Road towards the bridge over Wellingrove Creek, 19km west of Glen Innes. Source: Peter Renshaw, September 2013. |
 |
Fingerboard sign assembly at the junction of Gwydir Highway & Ilparran Road, 19km west of Glen Innes. Source: Peter Renshaw, September 2013. |
 |
Fingerboard sign assembly at the junction of Gwydir Highway & Spring Mountain Road, 30km west of Glen Innes. Source: Peter Renshaw, September 2013. |
 |
Fingerboard sign assembly on Gwydir Highway at the rest area, 34km west of Glen Innes. Source: Peter Renshaw, September 2013. |
 |
Fingerboard sign assembly missing B76 at the junction of Gwydir Highway & Dodds Lane, 48km west of Glen Innes/19km east of Inverell. Source: Peter Renshaw, September 2013. |
 |
Fingerboard sign assembly at the junction of Gwydir Highway & Woodstock Road, 17km east of Inverell. Note the brown Fossickers Way name plates which have begun appearing - these appear to date from a 1990s attempt to brand the Warialda-Glen Innes section of Gwydir Highway as part of 'Fossickers Way' which has not been maintained. Source: Peter Renshaw, September 2013. |
 |
Fingerboard sign assembly at the junction of Gwydir Highway & Long Plain Lane, 12km east of Inverell. Source: Peter Renshaw, September 2013. |
 |
Fingerboard sign assembly at the junction of Gwydir Highway & Elsmore Road, 5km east of Inverell. Source: Peter Renshaw, September 2013. |
 |
Fingerboard sign assembly at the junction of Gwydir Highway & Runnymede Drive, 4km east of Inverell. Source: Peter Renshaw, September 2013. |
 |
RD sign eastbound on Gwydir Highway on the eastern outskirts of Inverell. Note the 'Fossickers Way' name patch. Source: Peter Renshaw, September 2013. |
 |
AD sign westbound on Gwydir Highway (Glen Innes Road) approaching the junction with Mansfield Street. Mansfield Street provides a short cut to the Ashford Road, bypassing Inverell town centre. Source: Peter Renshaw, September 2013. |
 |
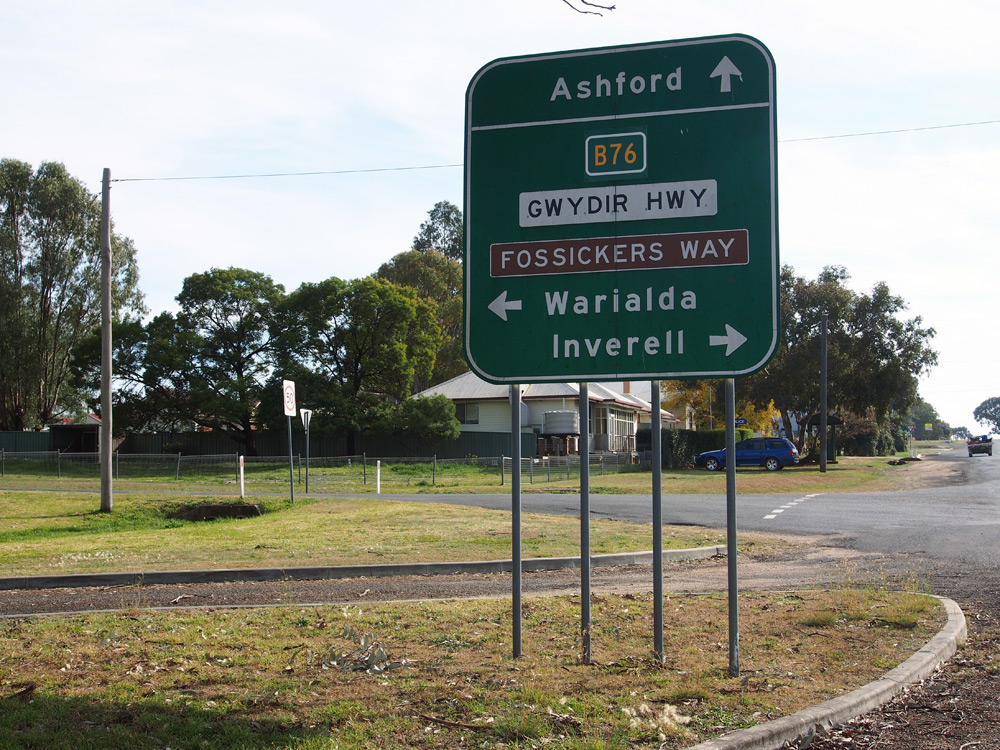
Fingerboard and dodgy ID sign assembly at the junction of Gwydir Highway (Glen Innes Road) & Mansfield Street, Inverell. Source: Peter Renshaw, September 2013. |
 |
AD sign westbound on Gwydir Highway approaching the junction with Tingha Road (Thunderbolts Way), Inverell. Note the 'Fossickers Way' name patch which has made another appearance but note that Thunderbolts Way, which is an actual gazetted road name beginning further south, is not included. Source: Peter Renshaw, September 2013. |
 |
ID sign assembly at the junction of Gwydir Highway (Glen Innes Road) & Tingha Road, Inverell. Source: Peter Renshaw, September 2013. |
 |
AD sign northbound on Tingha Road approaching the O'Connor Bridge over the Macintyre River and the junction with Gwydir Highway (Glen Innes Road), Inverell. Source: Peter Renshaw, September 2013. |
 |
AD sign eastbound on Gwydir Highway (Glen Innes Road) approaching the junction with Tingha Road, Inverell. Source: Peter Renshaw, September 2013. |
 |
Gwydir Highway (Glen Innes Road) looking west near Vivian Street, Inverell. Source: Peter Renshaw, September 2013. |
  |
Westbound signage on Gwydir Highway (Glen Innes Road) approaching the junction with Henderson Street, Inverell. Henderson and Campbell Streets provide an alternative route for through traffic which bypasses the Otho Street section of Gwydir Highway through the town centre. Note that the 'Fossickers Way' name patches have disappeared. Source: Peter Renshaw, September 2013. |
  |
ID signs at the junction of Gwydir Highway (Glen Innes Road/Otho Street) & Henderson Street, Inverell. Source: Peter Renshaw, September 2013. |
    |
ID signs at the junction of Gwydir Highway (Otho Street/Byron Street) & Byron Street, Inverell. Source: Peter Renshaw, September 2013. |
 |
AD sign southbound on Gwydir Highway (Byron Street) & Campbell Street, Inverell. Source: Peter Renshaw, September 2013. |
 |
AD sign westbound on Campbell Street approaching the junction with Gwydir Highway (Byron Street/Warialda Road), Inverell. Source: Peter Renshaw, September 2013. |
 |
Complicated diagrammatic AD sign eastbound on Gwydir Highway (Warialda Road) approaching the bridge over the Macintyre River, Inverell. The sign illustrates alternative routes for Gwydir Highway traffic via Campbell Street and Ashford Road traffic via Captain Cook Drive, both avoiding the main streets of Inverell town centre. Source: Peter Renshaw, September 2013. |
 |
ID sign at the junction of Gwydir Highway (Warialda Road) & Brae Street, Inverell. Source: Peter Renshaw, September 2013. |
 |
AD sign westbound on Gwydir Highway (Warialda Road) approaching the junction with Bannockburn Road, Inverell. Note the 'Fossickers Way' name patch has reappeared. Source: Peter Renshaw, September 2013. |
 |
Gwydir Highway (Warialda Road) looking west towards the junction with Bannockburn Road, Inverell. Source: Peter Renshaw, September 2013. |
 |
ID sign at the junction of Gwydir Highway (Warialda Road) & Bannockburn Road, Inverell. Note the dodgy 'Thunderbolts Way' sign - Inverell Shire has rebranded the route from Inverell to Yetman and on to Goondiwindi as part of Thunderbolts Way but it is not well signed. Source: Peter Renshaw, September 2013. |
 |
Deteriorating AD sign eastbound on Gwydir Highway (Warialda Road) approaching the junction with Bannockburn Road, Inverell. Source: Peter Renshaw, September 2013. |
 |
Dodgy fingerboard sign assembly at the junction of Gwydir Highway & Jardine Road on the western outskirts of Inverell. Jardine Road forms the western leg of a ring route across the northern side of Inverell, connecting to Bannockburn (Yetman) and Ashford Roads. Source: Peter Renshaw, September 2013. |
 |
Dodgy AD sign eastbound on Gwydir Highway approaching the junction with Jardine Road on the western outskirts of Inverell. Source: Peter Renshaw, September 2013. |
 |
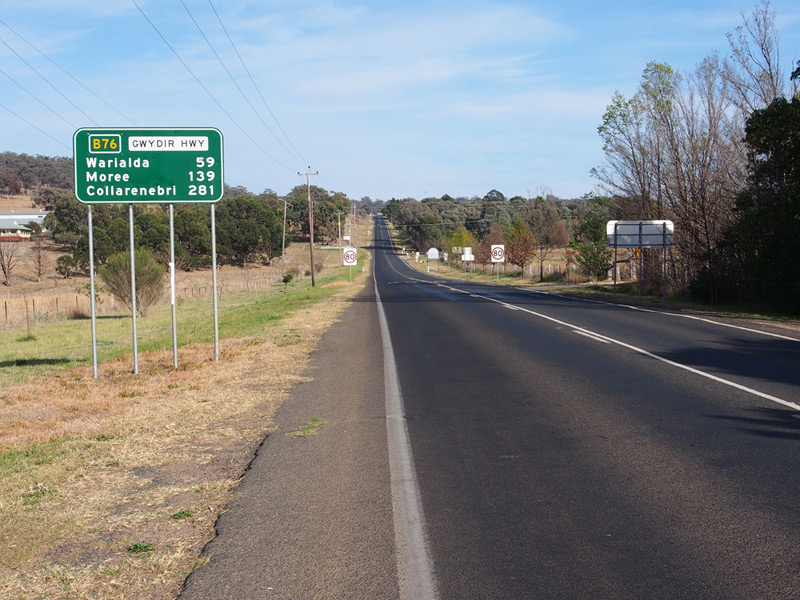
Alpha-numeric ready RD sign westbound on Gwydir Highway as you leave Inverell. Source: Peter Renshaw, September 2013. |
Photos of B76 - Inverell to Warialda |
|
 |
Gwydir Highway looking west through the junction with McIlveen Park Road, 4km west of Inverell. Source: Peter Renshaw, September 2013. |
 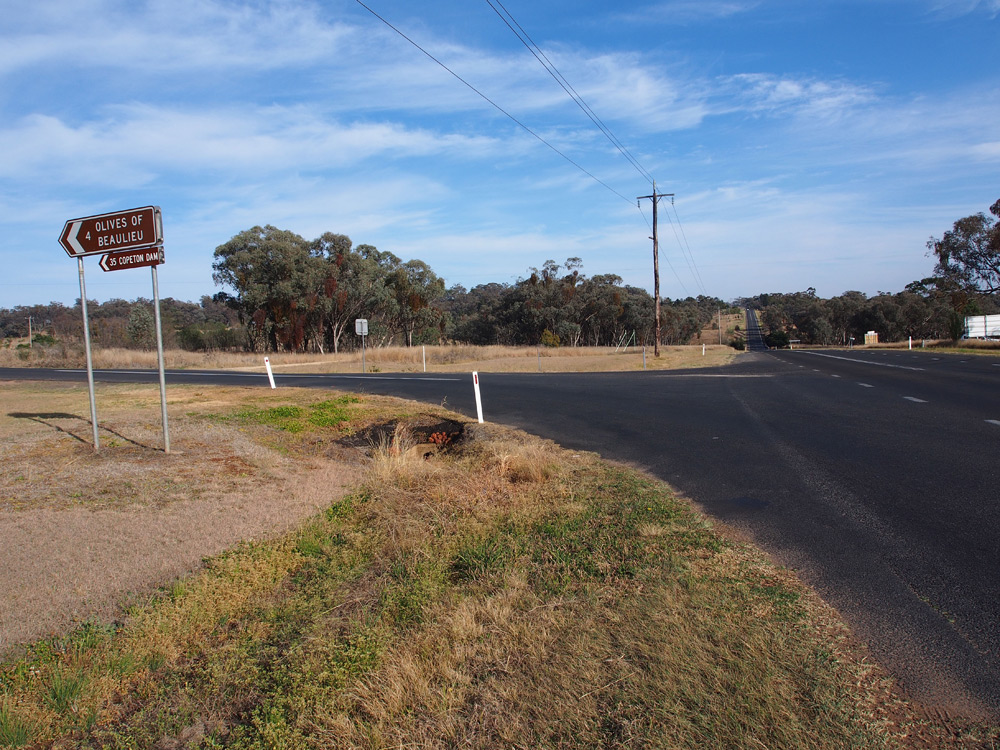 |
Assorted signage at the junction of Gwydir Highway & Copeton Dam Road, 4km west of Inverell. Source: Peter Renshaw, September 2013. |
 |
Standard RMS fingerboard sign assembly at the junction of Gwydir Highway & Fernhill Road, 5km west of Inverell. Source: Peter Renshaw, September 2013. |
Gwydir Highway looking west from the junction with Fernhill Road, 5km west of Inverell. Source: Peter Renshaw, September 2013. |
|
 |
Fingerboard sign assembly at the junction of Gwydir Highway & Rob Roy Road, 11km west of Inverell. Source: Peter Renshaw, September 2013. |
 |
Fingerboard sign assembly at the junction of Gwydir Highway & Eddy Park Lane, 12km west of Inverell. Source: Peter Renshaw, September 2013. |
 |
Gwydir Highway looking west from the junction with Eddy Park Lane, 12km west of Inverell. Source: Peter Renshaw, September 2013. |
 |
Fingerboard sign assembly at the junction of Gwydir Highway & Havilah Park Road, 17km west of Inverell. Source: Peter Renshaw, September 2013. |
  |
Two views of the fingerboard sign assembly at the junction of Gwydir Highway & Mt Russell Road, 18km west of Inverell. Source: Peter Renshaw, September 2013. |
 |
Fingerboard sign assembly at the junction of Gwydir Highway & Delungra Bypass Road, 24km west of Inverell. Delungra Bypass Road provides a short cut from Inverell to Bingara, compared to travelling via Delungra, but is unsealed. Source: Peter Renshaw, September 2013. |
 |
Fingerboard sign assembly at the junction of Gwydir Highway & the other end of Mt Russell Road, 30km west of Inverell / 2km east of Delungra. Source: Peter Renshaw, September 2013. |
 |
RD sign eastbound on Gwydir Highway as you leave Delungra. Note the Fossickers Way name patch and the unusual font used for 99 and 256. Source: Peter Renshaw, September 2013. |
 |
Gwydir Highway looking west as you enter the town of Delungra. Source: Peter Renshaw, September 2013. |
 |
AD sign westbound on Gwydir Highway (Inverell Street) approaching the junction with Gunnee Street, Delungra. Source: Peter Renshaw, September 2013. |
 |
AD sign southbound on Gunnee Street approaching the junction with Gwydir Highway (Inverell Street), Delungra. Source: Peter Renshaw, September 2013. |
 |
AD sign northbound on Gunnee Street approaching the junction with Gwydir Highway (Inverell Street), Delungra. Source: Peter Renshaw, September 2013. |
  |
Early and late 1990s era ID sign assemblies at the junction of Gwydir Highway (Inverell Street) & Gunnee Street, Delungra. Source: Peter Renshaw, September 2013. |
 |
AD sign eastbound on Gwydir Highway (Inverell Street) approaching the junction with Gunnee Street, Delungra. Source: Peter Renshaw, September 2013. |
 |
Slightly dodgy RD sign westbound on Gwydir Highway as you leave Delungra towards Warialda. Source: Peter Renshaw, September 2013. |
  |
Two westerly views of the junction of Gwydir Highway & Gragin Road, 3km west of Delungra, complete with awful dodgy fingerboard sign. Source: Peter Renshaw, September 2013. |
  |
Two views of the fingerboard sign assembly at the junction of Gwydir Highway & Adams Scrub Road, Koloona (12km west of Delungra). Love the old black fingerboard which has survived into the alpha-numeric era. Note that the Fossickers Way name has disappeared again. Source: Peter Renshaw, September 2013. |
 |
Fingerboard sign assembly at the turnoff to Cranky Rock Recreation Reserve, 6km east of Warialda. Source: Peter Renshaw, September 2013. |
 |
RD sign eastbound on Gwydir Highway on the eastern outskirts of Warialda. Note the Fossickers Way name patch has return - this time in white form. Source: Peter Renshaw, September 2013. |
 |
Gwydir Highway (Inverell Road) looking west into Warialda. Source: Peter Renshaw, September 2013. |
 |
Coverplated AD sign westbound on Gwydir Highway (Geddes Street) approaching the junction with Stephen Street, Warialda. The blank coverplate covers a State Route 95 shield - SR95 previous extended north from Warialda to Yetman however, as this section of road is no longer under RMS control, B95 was terminated at the B76 junction, west of Warialda. Source: Peter Renshaw, September 2013. |
 |
AD sign southbound on Stephen Street approaching the junction with Gwydir Highway (Geddes Street), Warialda. Note the remnant SR95 shield which had not yet been coverplated. Also interesting to note the two different size B76 route markers. Source: Peter Renshaw, September 2013. |
  |
ID sign assemblies at the junction of Gwydir Highway (Geddes Street) & Stephen Street, Warialda. Note that the Yetman sign has had its SR95 shield coverplated but the Bingara sign has not. Source: Peter Renshaw, September 2013. |
 |
Coverplated AD sign eastbound on Gwydir Highway (Geddes Street) approaching the junction with Stephen Street, Warialda. Note the blank coverplate over SR95 and the somewhat random appearance of Tourist Drive 4 which is only shown on a faded ID sign in the background and not on any of the other AD or ID signage. Source: Peter Renshaw, September 2013. |
 |
RD sign westbound on Gwydir Highway as you leave Warialda. Note that this sign incorrectly never had a SR95 shield and also note the Fossickers Way name patch. Source: Peter Renshaw, September 2013. |

Photos of B76 - Warialda to Moree |
|
  |
AD sign westbound on Gwydir Highway (B76) approaching the junction with Fossickers Way (B95), 2km west of Warialda. The top photo shows the sign after B76 had been signposted but before B95 had been unveiled, the bottom photo shows B95 also signed along with some damage to the sign face. Top photo: Peter Renshaw, September 2013. Bottom photo: Peter Renshaw, November 2015. |
 |
AD sign northbound on Fossickers Way (B95) approaching the junction with Gwydir Highway (B76), 2km west of Warialda. Source: Peter Renshaw, November 2015. |
  |
ID sign assembly at the intersection of Gwydir Highway (B76) & Fossickers Way (B95), 2km west of Warialda, before and after the signing of B95. Top photo: Peter Renshaw, September 2013. Bottom photo: Peter Renshaw, November 2015. |
 |
Gwydir Highway (B76) looking east towards the junction with Fossickers Way (B95), 2km west of Warialda. Source: Peter Renshaw, September 2013. |
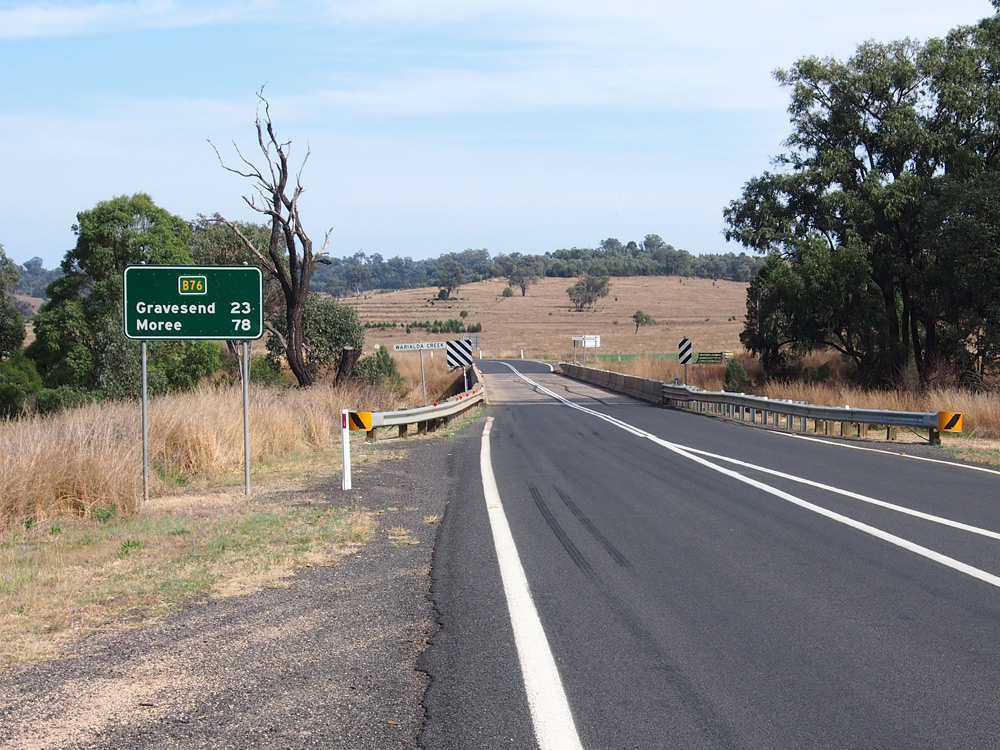 |
RD sign westbound on Gwydir Highway (B76) after the junction with Fossickers Way (B95), 2km west of Warialda. The concrete bridge over Warialda Creek can be seen in the middle ground. Source: Peter Renshaw, September 2013. |
  |
AD sign eastbound on Gwydir Highway (B76) approaching the junction with Fossickers Way (B95), 2km west of Warialda. The top photo shows the 1990s-era sign coverplated for B76, the bottom photo shows a new sign installed with B95 on it as well. Top photo: Peter Renshaw, September 2013. Bottom photo: Peter Renshaw, November 2015. |
 |
Gwydir Highway (B76) looking west from the above sign, 3km west of Warialda. Source: Peter Renshaw, September 2013. |
 |
Gwydir Highway (B76) looking west towards the bridge over the Gwydir River at Gravesend. The sign points along a track which leads to the 'Ezzy's Crossing' bridge over the Gwydir River on the disused Inverell branch railway line. Source: Peter Renshaw, September 2013. |
 |
Coverplated AD sign westbound on Gwydir Highway (B76) approaching Elcombe Road, 1km east of Gravesend. Source: Peter Renshaw, September 2013. |
 |
Fingerboard sign assembly at the junction of Gwydir Highway (B76) & Elcombe Road, 1km east of Gravesend. Source: Peter Renshaw, September 2013. |
 |
Coverplated AD sign eastbound on Gwydir Highway (B76) approaching Elcombe Road, 1km east of Gravesend. Source: Peter Renshaw, September 2013. |
 |
Gwydir Highway (B76) looking east through the village of Gravesend. Source: Peter Renshaw, September 2013. |
  |
Two views of coverplated black fingerboard sign on Gwydir Highway (B76) at Gravesend Road, 1km west of Gravesend. Source: Peter Renshaw, September 2013. |
 |
Dodgy coverplated fingerboard sign on Gwydir Highway (B76) at Romaka Road, Biniguy. Source: Peter Renshaw, September 2013. |
  |
More dodgy fingerboard signs at the junction of Gwydir Highway (B76) & Grattai Road, 30km east of Moree. Source: Peter Renshaw, September 2013. |
 |
Dodgy fingerboard signs at the junction of Gwydir Highway (B76) & Gum Flat Rd, 25km east of Moree. Source: Peter Renshaw, September 2013. |
 |
B76 coverplate functioning as a trailblazer at the intersection of Gwydir Highway (B76) & Tareelaroi Weir Road, 20km east of Moree. Source: Peter Renshaw, September 2013. |
 |
Coverplated black fingerboard sign at the intersection of Gwydir Highway (B76) & Mt Jerrybang Road, 18km east of Moree. Source: Peter Renshaw, September 2013. |
 |
Coverplated black fingerboard sign at the intersection of Gwydir Highway (B76) & Alice Downs Road, 16km east of Moree. Source: Peter Renshaw, September 2013. |
 |
Coverplated fingerboard sign assembly at the intersection of Gwydir Highway (B76) & Terry Hie Hie Road, 7km east of Moree. Source: Peter Renshaw, September 2013. |
 |
RD sign eastbound on Gwydir Highway (B76) on the eastern edge of Moree. Source: Peter Renshaw, September 2013. |
 |
AD sign westbound on Gwydir Highway (B76 / Alice Street) approaching the intersection with Newell Highway (A39 / Lou Swan Way) at Moree. At the time this photo was taken, the Moree Town Centre Bypass Stage 1 had been completed (north from Alice Street) and therefore there was a temporary A39/B76 duplex along Alice Street. Note the A39 had not yet been uncovered either. Source: Peter Renshaw, September 2013. |
AD signage southbound on Newell Highway (A39 / Lou Swan Way) approaching Gwydir Highway (B76 / Alice Street) at Moree. The middle and bottom photos shows the same sign assembly before and after the A39 route marker was uncovered. Top photo: Peter Renshaw, September 2013. Middle photo: January 2011. Bottom photo: Peter Renshaw, September 2013. |
|
  |
ID signage at the intersection of Newell Highway (A39 / Lou Swan Way) & Gwydir Highway (B76 / Alice Street) at Moree, with construction of Moree Town Centre Bypass Stage 2 underway in the background. Photos taken: January 2011. |
 |
AD sign eastbound on Gwydir Highway (B76 / Alice Street) approaching the intersection with Newell Highway (A39 / Lou Swan Way) at Moree. Source: Peter Renshaw, September 2013. |
  |
AD sign westbound on Gwydir Highway (B76 / Alice Street) approaching the intersction with Frome Street, Moree. At the time these photos were taken, the Newell Highway turned left and proceeded south along Frome Street. Also note the A39 route marker was uncovered in 2011 but had been covered up by 2013 before being uncovered again when the route was finally signed. Top photo: January 2011. Bottom photo: September 2013. |
ID sign assemblies at the intersection of Gwydir Highway (Alice Street / B76) & Newell Highway (Frome Street / A39), Moree. At the time the first photo was taken, the link from the northern end of the Town Centre Bypass to the Carnarvon Highway was not yet open, therefore Mungindi was covered on the ID sign. |
|
  |
AD sign northbound on Newell Highway (A39 / Frome Street) approaching the intersection with Gwydir Highway (Alice Street / B76), Moree. Note the dodgy coverplate shown in the top photo, a result of the link to Carnarvon Highway at the northern end of the bypass not yet being open to traffic. Top photo: January 2011. Bottom photo: September 2013. |
  |
AD sign southbound on Gwydir Highway (B76 / Frome Street) approaching the intersection with Alice Street, where the highway turns east towards Warialda. Again note the covering of the A39 route markers between 2011 and 2013. Top photo: January 2011. Bottom photo: September 2013. |
 |
ID sign assembly at the intersection of Balo Street & Heber Street, Moree. Balo Street was, until December 2010, the route of the Newell Highway through Moree as these signs indicate. Only one of the National Highway 39 route shields has been covered for some reason, while the National Route 38 shield has been covered by B76. Source: Peter Renshaw, September 2013. |
 |
Reassurance Direction sign westbound on Gwydir Highway as you leave Moree. Note the dodgy coverplate - not sure why this sign was designed without either National Route 38 or B76 on it. Source: Peter Renshaw, September 2013. |


Photos of B76 - Moree to Collarenebri |
|
  |
Two eastbound views of Gwydir Highway at its junction with Water Course Road, 11km west of Moree. Source: Peter Renshaw, April 2014. |
  |
Two views of dodgy fingerboard signage at the junction of Gwydir Highway & Mallawa Road, 27km west of Moree. Source: Peter Renshaw, April 2014. |
 |
Newer dodgy fingerboard signage at the junction of Gwydir Highway & Telleraga Road, 49km west of Moree. Note that the Gwydir Highway fingerboard sign is missing, despite the posts remaining. Source: Peter Renshaw, April 2014. |
 |
More dodgy fingerboard signs - this time at the junction of Gwydir Highway & Poison Gate Road, 64km west of Moree. Source: Peter Renshaw, April 2014. |
 |
More dodgy fingerboard signs - this time at the junction of Gwydir Highway & Goonal Road, 68km west of Moree. Source: Peter Renshaw, April 2014. |
 |
Gwydir Highway looking east from the junction with Bronte Road, 69km west of Moree. Source: Peter Renshaw, April 2014. |
 |
Gwydir Highway looking west through the intersection with Bronte Road, 69km west of Moree. Source: Peter Renshaw, April 2014. |
 |
More dodgy fingerboard signs at the junction of Gwydir Highway & Bronte Road, 69km west of Moree. Source: Peter Renshaw, April 2014. |
 |
Another dodgy fingerboard sign of the same style at the junction of Gwydir Highway & Wandoona Road, 71km west of Moree. Source: Peter Renshaw, April 2014. |
  |
Two easterly views of the dodgy fingerboard sign assembly at the junction of Gwydir Highway & Morialta Road, 83km west of Moree. Source: Peter Renshaw, April 2014. |
 |
Another dodgy fingerboard sign assembly at the junction of Gwydir Highway & Baroona Road, 103km west of Moree. Source: Peter Renshaw, April 2014. |
 |
More dodgy fingerboard signs, a standard fingerboard sign and an old brown tourist fingerboard sign at the junction of Gwydir Highway & Watercourse Road, 117km west of Moree / 24km east of Collarenebri. Source: Peter Renshaw, April 2014. |
  |
Two views of the dodgy (but far better than the rest of this stretch) fingerboard sign at the junction of Gwydir Highway & Pokataroo Road, 17km east of Collarenebri. Source: Peter Renshaw, April 2014. |
 |
Dodgy RD sign eastbound on Gwydir Highway after the junction with Merrywinebone Road, 9km east of Collarenebri. This sign, and others of a similar style at this junction, are probably dodgy replicas of the old DMR style of AD signs using white upper case lettering for road names. Source: Peter Renshaw, April 2014. |
 |
Dodgy AD sign northbound on Merrywinebone Road approaching the junction with Gwydir Highway, 9km east of Collarenebri. It's hard to see from this photo but the "I" in Gwydir is on a sticker. Source: Peter Renshaw, April 2014. |
  |
All-round dodgy ID signage at the junction of Gwydir Highway & Merrywinebone Road, 9km east of Collarenebri. At least it includes B76? Source: Peter Renshaw, April 2014. |
 |
Nicely designed late 1990s AD sign eastbound on Gwydir Highway approaching the junction with Merrywinebone Road, 9km east of Collarenebri. Source: Peter Renshaw, April 2014. |
 |
Dodgy RD sign westbound on Gwydir Highway after the junction with Merrywinebone Road, 9km east of Collarenebri. The 1934 steel truss bridge over Grawan Creek can bee seen in the background. Source: Peter Renshaw, April 2014. |
 |
Gwydir Highway looking east towards the steel truss bridge over Grawan Creek, 9km east of Collarenebri. Source: Peter Renshaw, April 2014. |
  |
Two views of dodgy fingerboard signage at the junction of Gwydir Highway & Cryon Road, 2km east of Collarenebri. Source: Peter Renshaw, April 2014. |
 |
RD sign eastbound on Gwydir Highway approaching the junction with Cryon Road, 2km east of Collarenebri. Source: Peter Renshaw, April 2014. |
 |
Looking east towards the Rocky Ford Bridge over Barwon River at Collarenebri. This bridge was constructed in 1985 to replace a 19th century, narrow timber truss bridge. The new bridge was named after the old Rocky Ford Crossing which the original bridge replaced. Source: Peter Renshaw, April 2014. |
 |
Looking north west from Rocky Ford Bridge into the main street of Collarenebri. Source: Peter Renshaw, April 2014. |
 |
Dodgy AD sign westbound on Gwydir Highway (Wilson Street) approaching the junction with Herbert Street, Collarenebri. Gwydir Highway turns left here towards Walgett. Note the unusual reference to an RMS administrative classification "Regional Road 457". Source: Peter Renshaw, April 2014. |
 |
Gwydir Highway (Wilson Street) looking south east from the junction with Herbert Street, Collarenebri. Source: Peter Renshaw, April 2014. |
 |
They missed one - AD sign south eastbound on Narran Street approaching Herbert Street, Collarenebri, about 100m north of the junction with Gwydir Highway. Source: Peter Renshaw, April 2014. |
 |
Dodgy fingerboard sign assembly at the junction of Gwydir Highway (Wilson Street) & Herbert Street, Collarenebri. Source: Peter Renshaw, April 2014. |
 |
AD sign north eastbound on Gwydir Highway (Herbert Street) approaching the junction with Wilson Street, Collarenebri. Source: Peter Renshaw, April 2014. |
Photos of B76 - Collarenebri to Walgett |
|
 |
Typical view of Gwydir Highway, looking east 15km east of the Castlereagh Highway / 44km west of Collarenebri. Source: Peter Renshaw, April 2014. |
 |
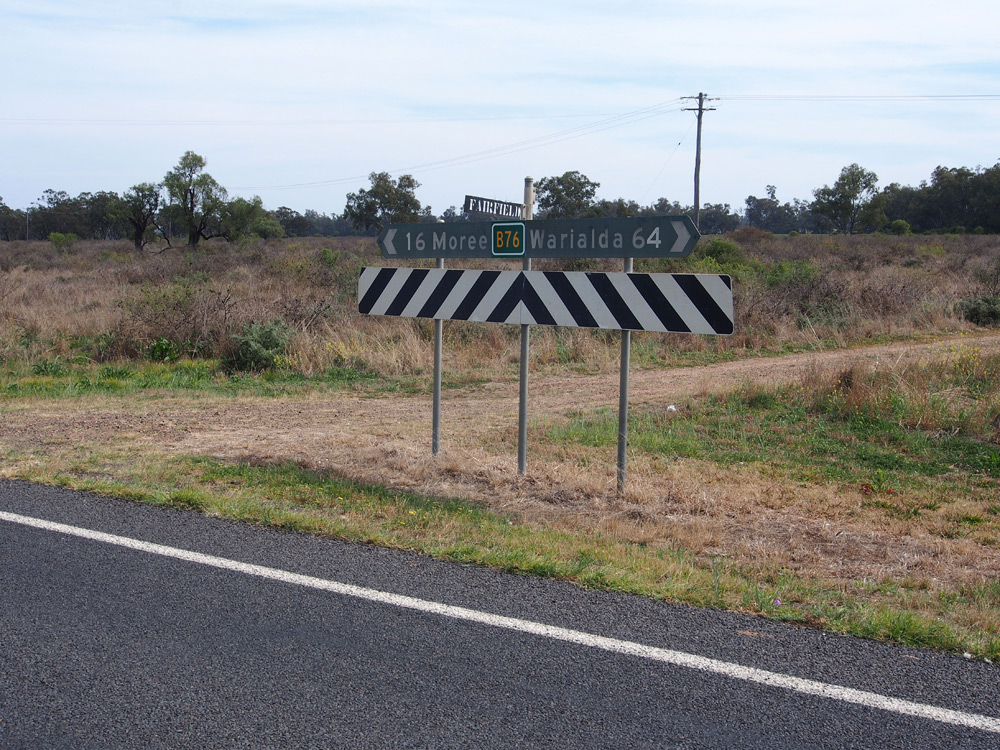
RD sign eastbound on Gwydir Highway after the junction with Castlereagh Highway, 14km north of Walgett. It's a little disappointing that this sign doesn't include Grafton as a remote focal point. Source: Peter Renshaw, April 2014. |
 |
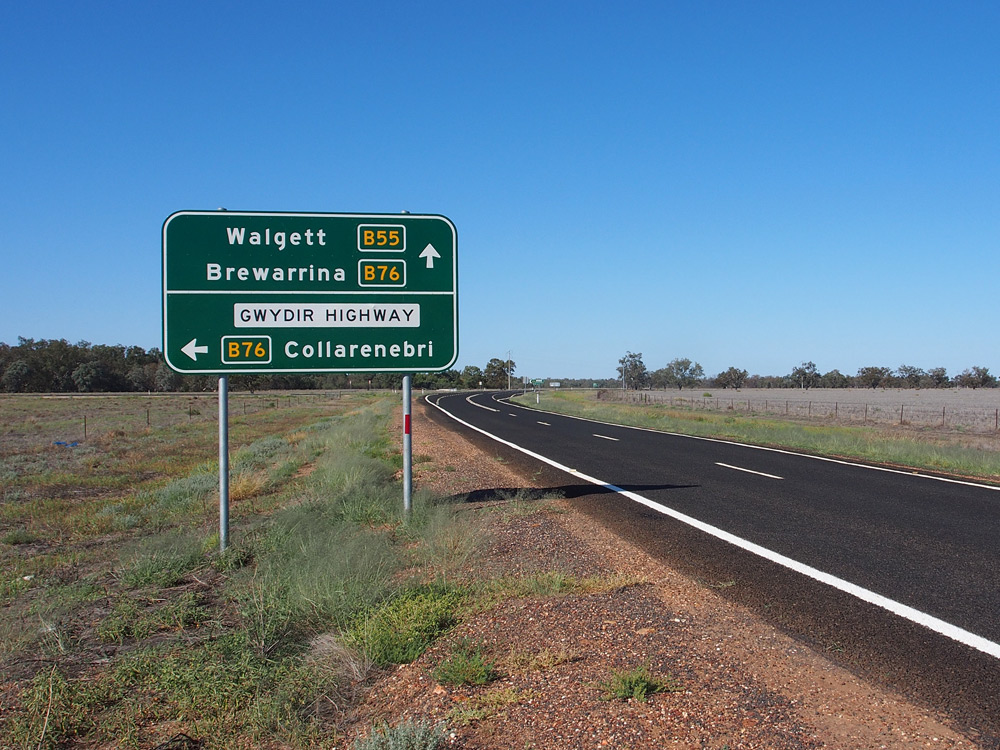
Nicely designed AD sign westbound on Gwydir Highway approaching its western termination at the junction with Castlereagh Highway, 14km north of Walgett. Route B76 turns south here, duplexing with route B55 into Walgett before again turning west towards Brewarrina. Source: Peter Renshaw, April 2014. |
 |
Another nice new AD sign southbound on Castlereagh Highway approaching the junction with Gwydir Highway, 14km north of Walgett. If I was to be pedantic, I would suggest that Brewarrina is unnecessary from this direction and the showing Moree would be more useful. Source: Peter Renshaw, April 2014. |
  |
Well-designed ID sign assembly at the junction of Castlereagh Highway & Gwydir Highway, 14km north of Walgett. Note the green fingerboard below the Collarenebri sign which says Moree which makes me wonder why it wasn't included in the main ID sign. RMS Western Region seem to struggle with duplexes and consistent focal point signing. Top photo : Peter Renshaw, April 2014. Bottom photo: Peter Renshaw, September 2014. |
 |
AD sign northbound on Castlereagh Highway approaching the junction with Gwydir Highway, 14km north of Walgett. The mind boggles as to why Moree is not shown on this sign given it is shown on eastbound signage from Walgett. Source: Peter Renshaw, April 2014. |
 |
RD sign southbound on Castlereagh Highway after the junction with Gwydir Highway, 14km north of Walgett. Note the route numbers are the wrong way around - the lower number should be on the left. Source: Peter Renshaw, April 2014. |
 |
Fingerboard sign assembly with topknot at the junction of Castlereagh Highway & Mercadool Road, 6km north of Walgett. Note the blank coverplate - RMS originally installed this sign incorrectly with B55 only, omitting B76. Also note the absence of any focal point for B76, e.g. Collarenebri or Moree. Source: Peter Renshaw, April 2014. |
 |
RD sign northbound on Castlereagh Highway after the junction with Kamilaroi Highway, 4km north east of Walgett. Note the blank coverplate and topknot - this sign was incorrectly designed with only the B55 route marker and corrected during the 2013 alpha-numeric rollout. Source: Peter Renshaw, September 2014. |
 |
AD sign southbound on Castlereagh Highway approaching the junction with Kamilaroi Highway, 4km north east of Walgett. The Kamilaroi Highway stops here before recommencing in central Walgett for its westward journey to Bourke. Again note the blank coverplate over B55 and the B55/B76 topknot. Source: Peter Renshaw, April 2014. |
 |
AD sign westbound on Kamilaroi Highway approaching the junction with Castlereagh Highway, 4km north east of Walgett. Note the route numbers are on a large coverplate over what was just a B55 route marker. Source: Peter Renshaw, April 2014. |
 |
ID sign assembly at the junction of Castlereagh & Kamilaroi Highways, 4km north east of Walgett. I can't understand why route B51 was not extended from Narrabri to this junction as the current arrangement leaves a 180km section of the Kamilaroi Highway with no route number. Source: Peter Renshaw, April 2014. |
 |
Coverplated AD sign northbound on Castlereagh Highway approaching the junction with Kamilaroi Highway, 4km north east of Walgett. Note the inclusion of Collarenebri rather than Moree which is shown on signs through Walgett. Source: Peter Renshaw, April 2014. |
 |
RD sign southbound on Castlereagh Highway after the junction with Kamilaroi Highway, 4km north east of Walgett. Again note the blank coverplate and the B55/B76 duplex topknot. Source: Peter Renshaw, April 2014. |
  |
Older and newer RD signs northbound on Castlereagh Highway just before the bridge over the Namoi River at Walgett. As you can see in the first photo, the sign was originally designed incorrectly, omitting B76. Note that on the new sign Burren Junction has been replaced by Narrabri and Hebel by St George - both sensible changes. Note the mention of Moree which is then not followed up on subsequent signage - RMS Western Region seem to struggle with duplexes and consistent focal point signage. Top photo: Peter Renshaw, November 2012. Bottom photo: Peter Renshaw, April 2014. |
 |
A very quiet early morning shot of AD sign southbound on Castlereagh Highway (Fox Street) approaching the junction with Kamilaroi Highway (Wee Waa Street), Walgett. Source: Peter Renshaw, April 2014. |
 |
Looking north along Castlereagh Highway (Fox Street) from the junction with Kamilaroi Highway (Wee Waa Street), Walgett. This photo was taken very early on Anzac Day. Source: Peter Renshaw, April 2014. |
    |
The various ID signs at the junction of Castlereagh Highway (Fox Street) & Kamilaroi Highway (Wee Waa Street), Walgett. Note the use of Moree rather than Collarenebri, and the omission of Narrabri, which is shown on the eastbound AD sign but not the eastbound ID sign. Top 2 photos: Peter Renshaw, April 2014. 3rd photo: Peter Renshaw, June 2012. 4th photo: Peter Renshaw, November 2012. |
 |
AD sign northbound on Castlereagh Highway (Fox Street) approaching the junction with Kamilaroi Highway (Wee Waa Street), Walgett. Note the inclusion of Narrabri. Source: Peter Renshaw, April 2014. |
  |
Two AD sign assemblies eastbound on Kamilaroi Highway (Wee Waa Street) approaching the junction with Castlereagh Highway (Fox Street), Walgett. The top photo shows the first sign which was installed in 2005 and incorrectly omits B76 (not to mention that it should have been coverplated with National Route 55 when the photo was taken) and prefers Burren Junction over Narrabri. The bottom photo shows the much better designed sign erected in 2013 as part of the alpha-numeric rollout which correctly shows the B55/B76 duplex and includes both Narrabri and Moree. The incorrect sign in the first photo remains in situ as at April 2014. Top photo: April 2006. Bottom photo: Peter Renshaw, April 2014. |
  |
Dodgy fingerboard/ID hybrid signs at the junction of Kamilaroi Highway (Wee Waa Street) & Peel Street (heavy vehicle bypass around the north side of the town centre), Walgett. Note the omission of B76. Source: Peter Renshaw, April 2014. |
  |
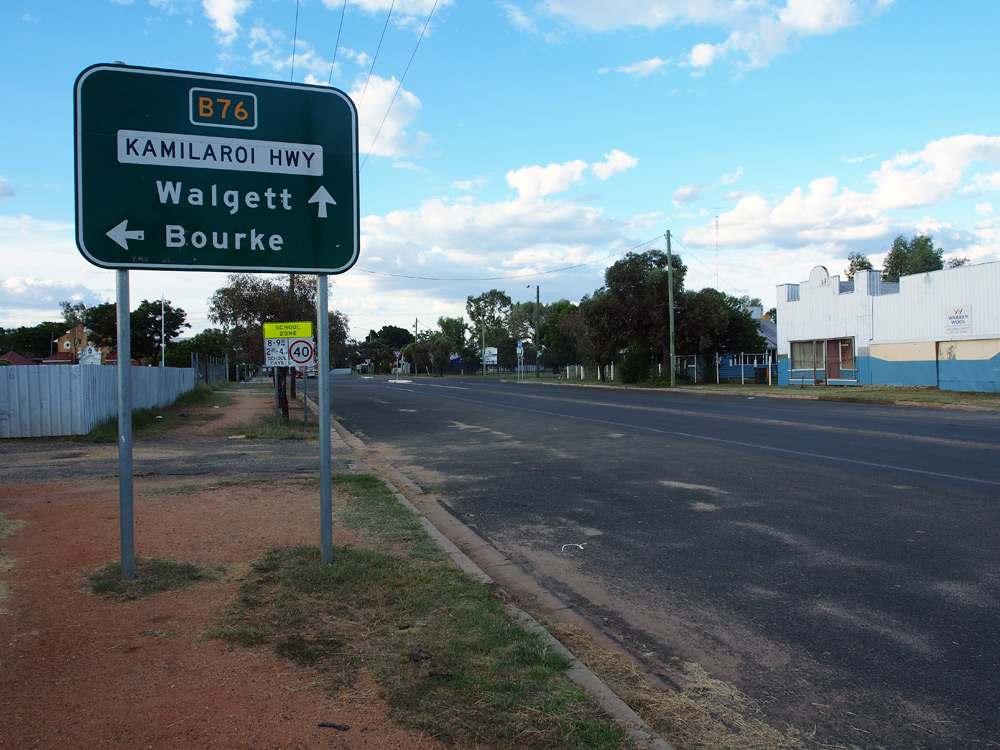
Two photos of the RD sign westbound on Kamilaroi Highway as you leave Walgett. Note that the sign appears to have been relocated since the first photo was taken in 2006. Also note the omission of Cumborah from the sign which might have been quite useful given the upcoming junction. |
Photos of B76 - Walgett to Brewarrina |
|
 |
Fingerboard sign assembly at the junction of Kamilaroi Highway & Brewon Road, 5km west of Walgett. Source: Peter Renshaw, April 2014. |
 |
RD sign eastbound on Kamilaroi Highway after the junction with Gingie Road, 6km west of Walgett. Source: Peter Renshaw, April 2014. |
  |
AD signs westbound on Kamilaroi Highway approaching the junction with Gingie Road, 6km west of Walgett. Source: Peter Renshaw, April 2014. |
 |
AD sign southbound on Gingie Road approaching the junction with Kamilaroi Highway, 6km west of Walgett. Source: Peter Renshaw, April 2014. |
 |
ID and fingerboard sign assembly at the junction of Kamilaroi Highway & Gingie Road, 6km west of Walgett. Source: Peter Renshaw, April 2014. |
 |
AD sign eastbound on Kamilaroi Highway approaching the junction with Gingie Road, 6km west of Walgett. Source: Peter Renshaw, April 2014. |
 |
RD sign westbound on Kamilaroi Highway after the junction with Gingie Road, 6km west of Walgett. Source: Peter Renshaw, April 2014. |
 |
Typical view of Kamilaroi Highway, looking west approximately 17km west of Walgett. Source: Peter Renshaw, April 2014. |
 |
Kamilaroi Highway looking west across the bridge over Sparkes Warrambool, 20km west of Walgett. Source: Peter Renshaw, April 2014. |
 |
Coverplated fingerboard sign at the junction of Kamilaroi Highway & Tungra Road, 24km west of Walgett. Source: Peter Renshaw, April 2014. |
 |
Fingerboard sign assembly in beautiful late afternoon light at the junction of Kamilaroi Highway & Ginghet Road, 61km west of Walgett. Source: Peter Renshaw, April 2014. |
 |
Fingerboard sign assembly at the junction of Kamilaroi Highway & Narran Lake Road, 66km west of Walgett. Source: Peter Renshaw, April 2014. |
 |
Rather large AD sign westbound on Kamilaroi Highway approaching the junction with Goodooga Road, 8km east/north of Brewarrina. Note the omission of Bourke, which has been on shown on AD signs since Walgett. |
 |
AD sign southbound on Goodooga Road approaching the junction with Kamilaroi Highway, 8km north of Brewarrina. Source: Peter Renshaw, April 2014. |
   |
ID and fingerboard signs in the afternoon sunlight at the junction of Kamilaroi Highway & Goodooga Road, 8km north of Brewarrina. Source: Peter Renshaw, April 2014. |
 |
Kamilaroi Highway northbound approaching the junction with Goodooga Road, 8km north of Brewarrina. Source: Peter Renshaw, April 2014. |
 |
RD sign southbound on Kamilaroi Highway after the junction with Goodooga Road, 8km north of Brewarrina. The Kamilaroi runs southward into Brewarrina before turning west again towards Bourke. Source: Peter Renshaw, April 2014. |
 |
RD sign northbound on Kamilaroi Highway (Bridge Road) as you leave Brewarrina, with the bridge over the Barwon River flood channel in the background. Note that Weilmoringle and Moree are shown on this sign but rather unhelpfully not mentioned on signs at the Goodooga Road junction. Source: Peter Renshaw, April 2014. |
 |
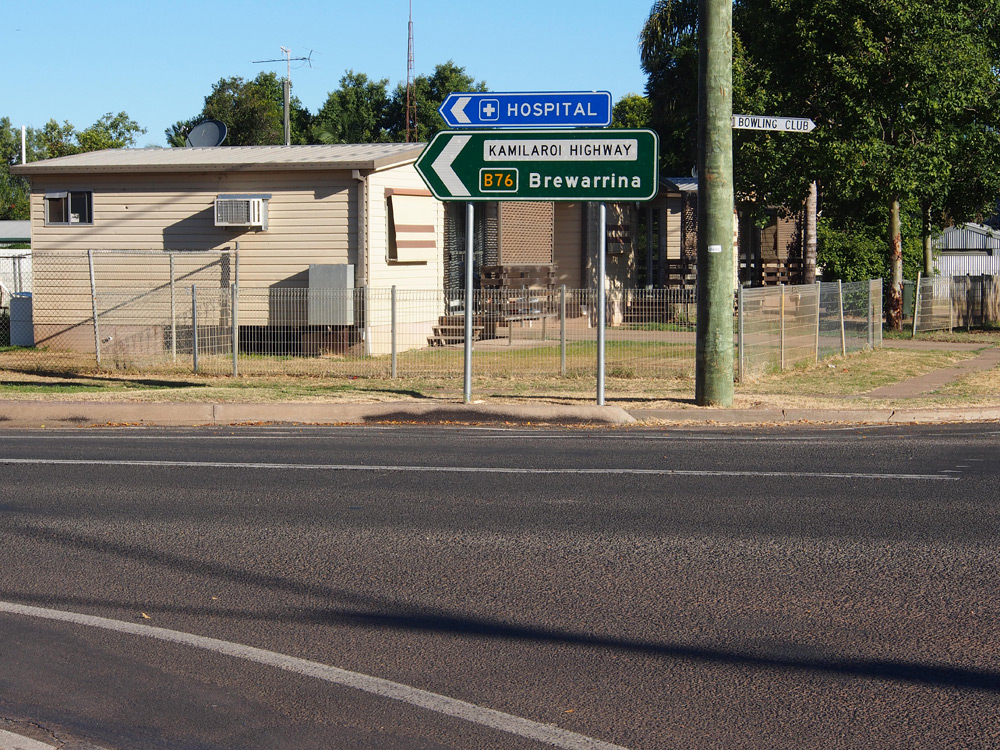
AD sign southbound on Kamilaroi Highway (Belmore Street) approaching Bathurst Street, Brewarrina. The Kamilaroi Highway turns right here and heads west towards Bourke. Source: Peter Renshaw, April 2014. |
 |
AD sign northbound on Belmore Street approaching the junction with Kamilaroi Highway (Bathurst Street/Belmore Street), Brewarrina. Source: Peter Renshaw, April 2014. |
    |
ID signs at the junction of Bathurst & Belmore Streets, Brewarrina. Source: Peter Renshaw, April 2014. |
 |
AD sign eastbound on Kamilaroi Highway (Bathurst Street) approaching the junction with Belmore Street, Brewarrina. Source: Peter Renshaw, April 2014. |
 |
Kamilaroi Highway looking east on the western outskirts of Brewarrina. Source: Peter Renshaw, April 2014. |
 |
Sun-affected photo of the RD sign westbound on Kamilaroi Highway as you leave Brewarrina. Source: Peter Renshaw, April 2014. |
Photos of B76 - Brewarrina to Bourke |
|
  |
Lovely old black fingerboard signs at the junction of Kamilaroi Highway & Oxley Road, Watsons Well, 28km east of Bourke. Source: Peter Renshaw, April 2014. |
 |
Kamilaroi Highway looking east from the junction with Dry Bogan Road, 11km east of Bourke. Source: Peter Renshaw, April 2014. |
 |
Fingerboard sign with topknots at the junction of Kamilaroi Highway & Dry Bogan Road, 11km east of Bourke. Source: Peter Renshaw, April 2014. |
 |
Brand new RD sign eastbound on Kamilaroi Highway on the eastern outskirts of Bourke. It is disappointing that this sign omits any reference to Walgett. Source: Peter Renshaw, April 2014. |
 |
Kamilaroi Highway (Mitchell Street) looking west into the evening sun on approaching the junction with Mitchell Highway (Warraweena Street), Bourke. Source: Peter Renshaw, April 2014. |
    |
ID sign assemblies at the junction of Mitchell Highway (Mitchell Street/Warraweena Street) & Kamilaroi Highway (Mitchell Street), Bourke. This is the western terminus of B76. Source: Peter Renshaw, April 2014. |
 |
Perfectly proportioned AD sign southbound on Mitchell Highway (Warraweena Street) approaching the junction with Kamilaroi HIghway (Mitchell Street), Bourke. Source: Peter Renshaw, April 2014. |
 |
Shadow-covered AD sign eastbound on Mitchell Highway (Mitchell Street) approaching the beginning of the Kamilaroi Highway, Bourke. Source: Peter Renshaw, April 2014. |
Last updated 22 July 2018 © Ozroads 2003-2018. |