NSW Route B75 Cobb Highway |
RD sign with dodgy B75 route marker, westbound on Cobb Highway near Browning Street, Deniliquin. Source: Peter Renshaw, August 2013.
Introduced: August 2013
Replaced: National Route 75
Length: 570km
Northern Terminus: Barrier Highway & Cobb Highway, 18km south of Wilcannia
Southern Terminus: NSW/Vic Border, Cobb Highway, Moama
Interstate Continuation: B75 (Victoria)
Route taken: Cobb Highway (includes Columbus Street through Ivanhoe; Lachlan Street through Hay; Hay Road, Davidson Street, Charlotte Street, Hardinge Street & Ochtertyre Street through Deniliquin; and Meninya Street through Moama)
Focal Points: (Wilcannia), Ivanhoe, Hay, Deniliquin, (Echuca)
Roads Act 1993 classification: Highway No. 21
Notable Events:
January 2005 - first uncovered B75 sign spotted at Deniliquin
September 2012 - Alpha-numeric route marking scheme announced by RMS
August 2013 - route B75 signposting commenced
Description:
Route B75 is a north-south route in western NSW, following the Cobb Highway. It directly replaces the former National Route 75, including the never signed section of NR75 from Hay to Wilcannia.
History:
Coming soon...
Signage:
The first exposed B75 route markers were spotted in Deniliquin in January 2005, followed by several uncovered B75 route markers at the junction with B64 in Hay some months later.
Approximately 50% of signs along the route were converted to be alpha-numeric ready by late 2012. A handful of signs north of Hay incorrectly included National Route 75 route markers on the coverplates - this section of NR75 was never actually commissioned.
When Peter Renshaw traveled from Moama to Hay in late August 2013, signposting of route B75 was underway, with the majority of uncovered signs appearing in Deniliquin. Photos below dated August 2013 show the extent of B75 signposting at that time. When Peter returned in April 2014, signposting of B75 had been well and truly completed.
Some of the B75 coverplates shown in the August 2013 photos in Deniliquin were rather undersized and many of these were subsequently corrected before April 2014.
|
Photos of route B75 - Moama to Deniliquin |
|
 |
Black ID sign with a B75 overlay at the intersection of Cobb Highway & Shaw Street, Moama. Source: Peter Renshaw, April 2014. |
 |
AD sign northbound on Cobb Highway approaching Perricoota Road, Moama. Source: Peter Renshaw, April 2014. |
 |
New AD sign eastbound on Perricoota Road approaching Cobb Highway, Moama. Source: Peter Renshaw, April 2014. |
 |
ID sign assembly at the junction of Cobb Highway & Perricoota Road, Moama. Source: Peter Renshaw, August 2013. |
 |
A view south along Cobb Highway towards the junction with Perricoota Road, Moama. Source: Peter Renshaw, August 2013. |
 |
New AD sign southbound on Cobb Highway approaching Perricoota Road, Moama. Source: Peter Renshaw, April 2014. |
 |
RD sign northbound on Cobb Highway on the northern outskirts of Moama. Source: Peter Renshaw, April 2014. |
  |
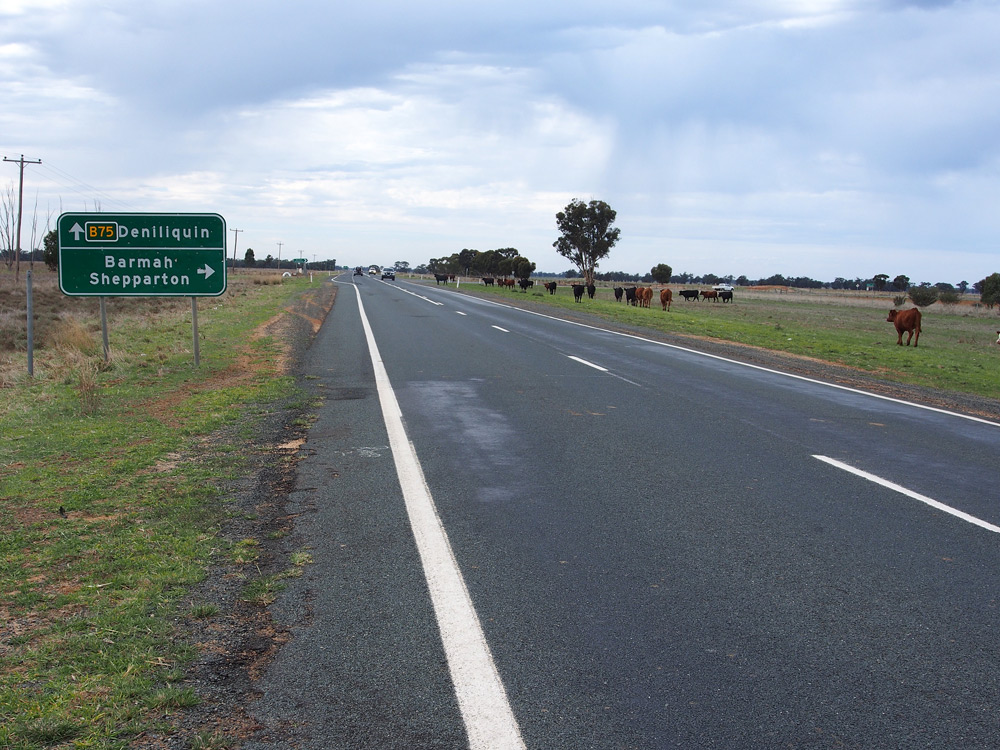
RD sign southbound on Cobb Highway after the junction with Barmah Road, 16km north of Moama. The top photo shows an incorrect Victorian-style B75 route marker which was corrected during the RMS rollout of B75 in late 2013. |
 |
AD sign northbound on Cobb Highway approaching Barmah Road, 16km north of Moama. Source: Peter Renshaw, April 2014. |
 |
New AD sign westbound on Barmah Road approaching the junction with Cobb Highway, 16km north of Moama. Source: Peter Renshaw, April 2014. |
 |
Coverplated ID sign assembly at the junction of Cobb Highway & Barmah Road, 16km north of Moama. Source: Peter Renshaw, April 2014. |
 |
Coverlated AD sign southbound on Cobb Highway approaching the junction with Barmah Road, 16km north of Moama. Source: Peter Renshaw, April 2014. |
 |
RD sign northbound on Cobb Highway after the junction with Barmah Road, 16km north of Moama. Source: Peter Renshaw, April 2014. |
  |
Fingerboard signs at the junction of Cobb Highway (Moama Street) & Lawrence Street, Mathoura. Source: Peter Renshaw, April 2014. |
  |
Fingerboard sign assemblies on either side of the Cobb Highway at Walliston Road, 14km north of Mathoura. Source: Peter Renshaw, April 2014. |
  |
RD sign southbound on Cobb Highway after the junction with Saleyards Road, Deniliquin. Note the two white stripes on the edge of the B75 sticker in the top photo - I think these were meant to be removed on installation? The bottom photo shows the sign with a proper size B75 coverplate. Top photo: Peter Renshaw, August 2013. Bottom photo: Peter Renshaw, April 2014. |
AD sign northbound on Cobb Highway approaching the junction with Saleyards Road on the southern outskirts of Deniliquin, showing the initial undersized B75 overlay and the subsequent proper sized B75. Top photo: Peter Renshaw, August 2013. Bottom photo: Peter Renshaw, April 2014. |
|
     |
Various incarnations of AD signs northbound on Cobb Highway approaching the junction with Crispe Street (former route of Cobb Highway), Deniliquin. The first photo shows the prematurely uncovered sign in January 2005. Presumably the sign was hit by an errant vehicle as the second and third photos show a replacement sign as seen in October 2011. Note the blank coverplate incorrectly used instead of a National Route 75 coverplate. The fourth photo shows the sign following removal of the coverplate in August 2013, showing the dodgy route marker. Finally, the fifth photo shows the sign corrected with a proper B75 route marker in April 2014. Top photo: January 2005. 2nd & 3rd photos: Peter Renshaw, October 2011. 4th photo: Peter Renshaw, August 2013. 5th photo: Peter Renshaw, April 2014. |
 |
Fingerboard sign at the junction of Cobb Highway & Crispe Street, Deniliquin. Not sure that Finley and Hay are entirely relevant at this end of town - perhaps Barham and Wakool would have been more relevant. Source: Peter Renshaw, August 2013. |
 |
Dodgy ID sign assembly, complete with B75 stickers, at the junction of Crispe Street & Lawson Syphon Rd, Deniliquin, adjacent to the junction with Cobb Highway. Source: Peter Renshaw, August 2013. |
 |
RD sign southeastbound on Cobb Highway after the junction with Ochtertyre Street & Hardinge Street, Deniliquin. Source: Peter Renshaw, August 2013. |
 |
AD sign northwestbound on Cobb Highway approaching the junction with Ochtertyre Street & Hardinge Street, Deniliquin. Note the incorrect spelling of Ochtertyre Street on the sign. Source: Peter Renshaw, April 2014. |
 |
AD sign northeastbound on Hardinge Street approaching the junction with Cobb Highway & Ochtertyre Street, Deniliquin. Note the incorrect spelling of Ochtertyre Street on the sign. Source: Peter Renshaw, April 2014. |
 |
AD sign eastbound on Ochtertyre Street approaching the junction with Cobb Highway & Hardinge Street, Deniliquin. Source: Peter Renshaw, April 2014. |
  |
ID signs at the junction of Cobb Highway, Hardinge Street & Ochtertyre Street, Deniliquin. Source: Peter Renshaw, August 2013. |
 |
AD sign southbound on Cobb Highway (Hardinge Street) approaching the junction with Hardinge Street & Ochtertyre Street, Deniliquin. Note the incorrect spelling of Ochtertyre Street on the sign. Source: Peter Renshaw, August 2013. |
   |
AD sign northbound on Cobb Highway (Hardinge Street) approaching the junction with Charlotte Street, Deniliquin. The top two photos show the initial undersized B75 overlay installed in August 2013 - note the marks on the sign from where the signface has been cleaned, prior to application of the B75 sticker, and the faint outline of the National Route 75 shield. The third photo shows the proper size B75 coverplate subsequently installed. Top 2 photos: Peter Renshaw, August 2013. Bottom photo: Peter Renshaw, April 2014. |
  |
South-pointing ID sign assembly at the junction of Charlotte & Hardinge Streets, Deniliquin. The top photo shows the initial undersized B75 overlay and the subsequent proper sized overlay. Top photo: Peter Renshaw, August 2013. Bottom photo: Peter Renshaw, April 2014. |
  |
North-pointing ID sign assembly at the junction of Charlotte & Hardinge Streets, Deniliquin. The top photo shows the initial undersized B75 overlay and the subsequent proper sized overlay. Top photo: Peter Renshaw, August 2013. Bottom photo: Peter Renshaw, April 2014. |
  |
AD sign westbound on Cobb Highway (Charlotte Street) approaching the junction with Hardinge Street, Deniliquin. The top photo shows the initial undersized B75 overlay and the subsequent proper sized overlay. Top photo: Peter Renshaw, August 2013. Bottom photo: Peter Renshaw, April 2014. |
 |
Dodgy AD sign eastbound on Cobb Highway (Charlotte Street) approaching the junction with Napier Street, Deniliquin. Source: Peter Renshaw, April 2014. |
 |
ID sign assemblies at the junction of Charlotte & Napier Streets, Deniliquin. Cobb Highway makes several turns to bypass the town centre to the west. Source: Peter Renshaw, August 2013. |
  |
AD sign southbound on Cobb Highway (Davidson Street) approaching the junction with Napier Street, located on the other side of the bridge over the Edward River. The top photo shows the sign with a dodgy blank coverplate in October 2011; the second shows the sign following removal of the coverplate in August 2013. Top photo: Peter Renshaw, October 2011. Bottom photo: Peter Renshaw, August 2013. |
  |
AD sign northbound on Cobb Highway (Davidson Street) approaching the junction with Riverina Highway (Finley Road), Deniliquin. The second photo shows that both overlays were replaced, although the B58 overlay still seems rather undersized. |
   |
ID signs at the junction of Cobb & Riverina Highways, Deniliquin. Note the white stripes on the sticker overlay and the faint outline of the National Route 75 shield beneath. Source: Peter Renshaw, August 2013. |
 |
AD sign southbound on Wanderer Street, Deniliquin, approaching the junction with Riverina Highway (Finley Road). The roundabout junction of Cobb Highway & Riverina Highway can be seen to the right. Source: Peter Renshaw, April 2014. |
 |
ID sign assembly featuring at B75 route marker at the junction of Riverina Highway (Finley Road) & Wanderer Street, Deniliquin, approximately 30m east of the Cobb Highway junction. |
 |
Diagrammatic AD sign westbound on Riverina Highway approaching the junctions with Wanderer Street and Cobb Highway, Deniliquin. |
 |
AD sign eastbound on Cobb Highway (Hay Road) approaching the junction with Riverina Highway (Finley Road), Deniliquin. |
 |
Looking east along Cobb Highway (Hay Road) at the junction with Browning Street, Deniliquin. Source: Peter Renshaw, August 2013. |
  |
RD sign westbound on Cobb Highway (Hay Road) after the junction with Browning Street, Deniliquin. Note the dodgy route marker with the gold legend and border in the top photo which was coverplated with the correct route marker in the bottom photo. Top photo: Peter Renshaw, August 2013. Bottom photo: Peter Renshaw, April 2014. |


Photos of B75 - Deniliquin to Hay |
|
|
RD sign southbound on Cobb Highway as you leave Pretty Pine, 17km north of Deniliquin. Source: Peter Renshaw, April 2014. |
 |
AD sign northbound on Cobb Highway approaching the junction with Pretty Pine Road (shown as Moulamein Road on the signs for some reason) at Pretty Pine. Source: Peter Renshaw, April 2014. |
 |
AD sign eastbound on Pretty Pine Road approaching the junction with Cobb Highway, Pretty Pine. Source: Peter Renshaw, April 2014. |
 |
ID sign assembly at the junction of Cobb Highway & Pretty Pine Road, Pretty Pine. Source: Peter Renshaw, April 2014. |
 |
AD sign southbound on Cobb Highway approaching the junction with Pretty Pine Road, Pretty Pine. Source: Peter Renshaw, April 2014. |
 |
RD sign northbound on Cobb Highway as you leave Pretty Pine. Source: Peter Renshaw, April 2014. |
  |
Two shots of the fingerboard sign assembly at the junction of Cobb Highway & Wanganella-Moulamein Road, 46km north of Deniliquin. Source: Peter Renshaw, April 2014. |
  |
Two shots of the dodgy fingerboard signs at the junction of Cobb Highway & Booroorban-Tchelery Road, Booroorban, 75km north of Deniliquin. Love the old black fingerboard. Source: Peter Renshaw, April 2014. |
 |
Looking north along Cobb Highway near Booroorban, 75km north of Deniliquin. Source: Peter Renshaw, April 2014. |
  |
Two views of the black fingerboard sign with B75 coverplate at the junction of Cobb Highway & West Burrabogie Road, 89km north of Deniliquin. Source: Peter Renshaw, April 2014. |
 |
A typical Hay Plains landscape on Cobb Highway looking north from West Burrabogie Road, 89km north of Deniliquin. Source: Peter Renshaw, April 2014. |
  |
Two views of the fingerboard sign assembly at the junction of Cobb Highway & Jerilderie Road, 114km north of Deniliquin. Note the black fingerboards pointing to Jerilderie. Source: Peter Renshaw, April 2014. |
 |
RD sign southbound on Cobb Highway after the junction with Sturt Highway, South Hay. Source: Peter Renshaw, April 2014. |
  |
AD signs northbound on Cobb Highway approaching the junction with Sturt Highway, South Hay. Source: Peter Renshaw, April 2014. |
    |
ID signs at the roundabout junction of Cobb Highway & Sturt Highway, South Hay. Source: Peter Renshaw, April 2014. |
  |
AD signs eastbound on Sturt Highway approaching the junction with Cobb Highway, South Hay. Note that there is no AD sign for Mid Western Highway on this approach. Source: Peter Renshaw, April 2014. |
   |
AD signs westbound on Sturt Highway approaching the junction with Cobb Highway, South Hay. Source: Peter Renshaw, April 2014. |
  |
AD signs southbound on Cobb Highway approaching the junction with Sturt Highway, South Hay. Source: Peter Renshaw, April 2014. |
 |
RD sign northbound on Cobb Highway after the junction with Sturt Highway, South Hay. The pre-alpha-numeric sign at this location also included National Route 24 (now B64). Source: Peter Renshaw, April 2014. |
 |
Dodgy AD sign northbound on Cobb Highway (Lachlan Street) approaching the junction with Cadell Street, Hay. Source: Peter Renshaw, April 2014. |
 |
AD sign eastbound on Cadell Street approaching the junction with Cobb Highway (Lachlan Street), Hay. Source: Peter Renshaw, April 2014. |
  |
ID signs at the junction of Cobb Highway (Lachlan Street) & Cadell Street, Hay. Source: Peter Renshaw, April 2014. |
Dodgy overhead AD sign northbound on Cobb Highway (Lachlan Street) approaching the junction with Mid Western Highway (Murray Street), Hay. Source: Peter Renshaw, April 2014. |
|
   |
ID signs at the junction of Cobb Highway (Lachlan Street) & Mid Western Highway (Murray Street), Hay. Note the dodgy Victorian-style ID sign in the first photo, reflecting the key junction this is on routes from Central NSW and Sydney to Melbourne and Adelaide. In my opinion, the standardised focal point signage used by RMS is not adequate to cater for navigation through the junctions in Hay. Also note that Balranald, which is shown on the AD sign, is missing from this sign. Source: Peter Renshaw, August 2013. |
 |
AD sign westbound on Mid Western Highway (Murray Street) approaching the junction with Cobb Highway (Lachlan Street), Hay. Note the inclusion of Balranald, which is not shown on the ID sign. Source: Peter Renshaw,June 2012. |
 |
AD sign southbound on Cobb Highway (Lachlan Street) approaching the junction with Mid Western Highway (Murray Street), Hay. Source: Peter Renshaw, August 2013. |
  |
Two shots of the RD sign northbound on Cobb Highway as you leave Hay. Top photo: Peter Renshaw, August 2013. Bottom photo: Peter Renshaw, April 2014. |
Photos of B75 - Hay to Mossgiel |
|
 |
Typical view of the featureless Hay Plains; looking south approximately 15km north of Hay. Source: Peter Renshaw, April 2014. |
 |
Awfully dodgy fingerboard sign assembly at the junction of Cobb Highway & Corrong Road, 38km north of Hay. Source: Peter Renshaw, April 2014. |
 |
The historic One Tree Hotel just off the Cobb Highway at Corrong Road, 38km north of Hay. Source: Peter Renshaw, April 2014. |
 |
RD sign and B75 topknot, southbound on Cobb Highway at Booligal. Source: Peter Renshaw, April 2014. |
 |
ID and fingerboard sign assembly at the junction of Cobb Highway & Adelaide Street, Booligal. Love the old black ID sign. Source: Peter Renshaw, April 2014. |
 |
Cobb Highway looking south towards Adelaide Street at Booligal. The highway now bypasses the town, which is to the right of the photo. Source: Peter Renshaw, April 2014. |
 |
AD sign northbound on Cobb Highway approaching the junction with Lachlan Valley Way, Booligal. Source: Peter Renshaw, April 2014. |
 |
AD sign westbound on Lachlan Valley Way approaching the junction with Cobb Highway, Booligal. Source: Peter Renshaw, April 2014. |
 |
Dodgy fingerboard sign assembly at the junction of Cobb Highway & Lachlan Valley Way, Booligal. Note the omission of Gunbar which is included on both AD signs. Source: Peter Renshaw, April 2014. |
 |
AD sign southbound on Cobb Highway approaching the junction with Lachlan Valley Way, Booligal. Source: Peter Renshaw, April 2014. |
 |
Cobb Highway looking north towards the bridge over Lachlan River, Booligal. Source: Peter Renshaw, April 2014. |
 |
Cobb Highway looking south towards the bridge over Lachlan River, Booligal. Source: Peter Renshaw, April 2014. |
 |
RD sign and B75 topknot northbound on Cobb Highway at the junction with Boxyards Road, 1km north of Booligal. Note the distance discrepancy with the fingerboard sign in the background (see the photo below). Source: Peter Renshaw, April 2014. |
 |
Fingerboard sign assembly at the junction of Cobb Highway & Boxyards Road, 1km north of Booligal. Note the distance discrepancy with the RD sign in the previous photo. Source: Peter Renshaw, April 2014. |
 |
Cobb Highway looking south from the junction with Mutherumbung Road, 19km north of Booligal. Source: Peter Renshaw, April 2014. |
  |
Two shots of the fingerboard sign assembly at the junction of Cobb Highway & Mutherumbung Road, 19km north of Booligal. The top photo shows a prematurely uncovered Victorian-style B75 route marker. The bottom photo shows the sign as corrected during the B75 rollout in late 2013. |
 |
Dodgy fingerboard sign assembly at the junction of Cobb Highway & Daisy Plains Road, 33km north of Booligal. Source: Peter Renshaw, April 2014. |
 |
RD sign and B75 topknot (or is that a bottomknot?) with the friendly locals, southbound on Cobb Highway at Mossgiel. Source: Peter Renshaw, April 2014. |
 |
Nice new AD sign northbound on Cobb Highway approaching the junctions with Mossgiel Road & Clare Road, Mossgiel. Source: Peter Renshaw, April 2014. |
 |
Nice new AD sign westbound on Mossgiel Road approaching the junction with Cobb Highway, Mossgiel. Source: Peter Renshaw, April 2014. |
 |
Fingerboard sign assembly at the junction of Cobb Highway & Mossgiel Road, Mossgiel. Source: Peter Renshaw, April 2014. |
 |
Fingerboard sign assembly at the junction of Cobb Highway & Clare Road, approximately 200m north of Mossgiel Road, Mossgiel. Source: Peter Renshaw, April 2014. |
 |
AD sign southbound on Cobb Higvhway approaching the junctions with Mossgiel Road & Clare Road, Mossgiel. Source: Peter Renshaw, April 2014. |
 |
RD sign with topknot northbound on Cobb Highway as you leave Mossgiel. Source: Peter Renshaw, April 2014. |
Photos of B75 - Mossgiel to Wilcannia |
|
 |
AD sign northbound on Cobb Highway approaching the junction with Mitchell Street at Railtown, 2km south of Ivanhoe. Source: Peter Renshaw, April 2014. |
 |
RD sign with topknot, southbound on Cobb Highway as you leave Ivanhoe. Source: Peter Renshaw, April 2014. |
 |
ID and fingerboard sign assembly, complete with B75 topknots and an old 'Heritage Trail' tourist drive route marker at the junction of Cobb Highway (Columbus Street) & Behring Street, Ivanhoe. Source: Peter Renshaw, April 2014. |
 |
AD sign with a poorly located B75 coverplate, northbound on Cobb Highway (Columbus Street) approaching the junction with Balranald Road, Ivanhoe. Source: Peter Renshaw, April 2014. |
 |
Lovely old black ID sign assembly at the junction of Cobb Highway (Columbus Street) & Balranald Road, Ivanhoe. Source: Peter Renshaw, April 2014. |
 |
AD sign southbound on Cobb Highway (Columbus Street) approaching the junction with Balranald Road, Ivanhoe. Source: Peter Renshaw, April 2014. |
 |
A southerly view along Cobb Highway (Columbus Street) towards Bourke Street, Ivanhoe. Source: Peter Renshaw, April 2014. |
 |
Lovely old black AD sign northbound on Cobb Highway (Columbus Street) outside Ivanhoe Hospital. Source: Peter Renshaw, April 2014. |
 |
RD sign and topknot, southbound on Cobb Highway after the junction with Ivanhoe-Menindee Road, 5km north of Ivanhoe. Source: Peter Renshaw, April 2014. |
 |
AD sign northbound on Cobb Highway approaching the junction with Ivanhoe-Menindee Road, 5km north of Ivanhoe. Source: Peter Renshaw, April 2014. |
 |
Dodgy old black fingerboard sign assembly, complete with brand new B75 topknots, at the junction of Cobb Highway & Ivanhoe-Menindee Road, 5km north of Ivanhoe. Source: Peter Renshaw, April 2014. |
 |
Looking north towards the end of the sealed road, 9km north of Ivanhoe. The highway is unsealed for most of the journey from this point to Wilcannia. Source: Peter Renshaw, April 2014. |
 |
Standard RMS fingerboard sign assembly at the junction of Cobb Highway & Tasman Road, 17km north of Ivanhoe. Source: Peter Renshaw, April 2014. |
 |
Cobb Highway looking south from the junction with Baden Park Road, 42km north of Ivanhoe. Source: Peter Renshaw, April 2014. |
 |
Coverplated fingerboard sign assembly at the junction of Cobb Highway & Baden Park Road, 42km north of Ivanhoe. Source: Peter Renshaw, April 2014. |
 |
View south along Cobb Highway as it crosses Manara Creek, at the southern end of Manara Hills, 64km north of Ivanhoe. Source: Peter Renshaw, April 2014. |
 |
View south along Cobb Highway as it passes through Manara Hills, 65km north of Ivanhoe. Source: Peter Renshaw, April 2014. |
 |
Looking south along Cobb Highway approaching the low range of hills named Manara Hills, 66km north of Ivanhoe. Source: Peter Renshaw, April 2014. |
 |
Looking north from the above photo at the north end of the section through Manara Hills. The kilometre plate proclaims 115 more kilometres to Wilcannia. Source: Peter Renshaw, April 2014. |
 |
A brand new, 5km long section of sealed highway somewhere north of Manara Hills. Source: Peter Renshaw, April 2014. |
 |
Fingerboard sign assembly at the junction of Cobb Highway & Terawynia Road, 130km north of Ivanhoe / 52km south of Wilcannia. Source: Peter Renshaw, April 2014. |
 |
RD sign with topknot, southbound on Cobb Highway after the junction with Barrier Highway, 20km south of Wilcannia. Source: Peter Renshaw, April 2014. |
 |
Coverplated AD sign northbound on Cobb Highway approaching its northern terminus - the junction with Barrier Highway, 20km south of Wilcannia. Source: Peter Renshaw, April 2014. |
 |
ID sign assembly - one new and two old - at the junction of Barrier & Cobb Highways, 20km south of Wilcannia. Source: Peter Renshaw, April 2014. |
 |
Coverplated AD sign westbound on Barrier Highway approaching the junction with Cobb Highway, 20km south of Wilcannia. Source: Peter Renshaw, April 2014. |
 |
AD sign westbound on Barrier Highway approaching the junction with Cobb HIghway, 20km south of Wilcannia. Source: Peter Renshaw, April 2014. |
Last updated 12 June 2014 © Ozroads 2003-2014. |