WESTERN MOTORWAY
Historic Photos
 |
Newly opened Regentville Bridge in 1971. Only one of the twin bridges was constructed intially with duplication opening in 1986. Scanned from Main Roads Journal. |
Newly opened Regentville Bridge deck in 1971. Scanned from Main Roads Journal. |
|
 |
Duplication in progress at the Regentville Bridge, 1986. Scanned from M4 Brochure. |
 |
Aerial view of the completed interchange with The Northern Rd (then Bringelly Rd) in 1971. Scanned from Main Roads Journal. |
 |
Easterly view of the M4 carriageways in 1972 at Mamre Rd, St Marys. Scanned from Main Roads Journal. |
View of the temporary configuration of the Wallgrove Rd interchange when the freeway terminated there (1972-74). This interchange was constructed as a half diamond in 1974 and finally as a full diamond in 1992. |
|
The sweeping bend that linked the freeway to Gt Western Hwy at Prospect. This is now the location of the service centres, following the bypassing of this section in 1992. Photo taken 1974, Scanned from Main Roads Journal. |
|
 |
Looking west on the Gt Western Hwy at Prospect, showing the former left turn lanes to the westbound freeway from when it ended here (1974-92). Photo taken July 2004. |
  |
Looking west on the Gt Western Hwy at Mays Hill showing the old westbound merge from the freeway when it ended at Mays Hill (1982-92). Photos taken July 2004. |
 |
THe newly opened M4 section between Church St and Mays Hill in December 1982. |
A view of the newly-opened section of freeway between Church St and Mays Hill in 1982. This section has since been widened to 8 lanes at Pitt St. Scanned from Main Roads Journal. |
|
 |
Aerila view easterly over the Granville Viaduct under construction in 1985. Scanned from M4 Brochure. |
 |
Opening day of the Mays Hill-Prospect section and the toll booths at Silverwater. Scanned from RTA magazine, taken May 1992. |
 |
Construction of the Duck River viaduct in 1982. Scanned from M4 Brochure. |
Silverwater Rd looking south under the motorway prior to opening of the Nth Strathfield-Auburn section in 1982. Scanned from Main Roads Journal. |
|
Aerial view from 1978 of construction at the Silverwater Rd overpass. Scanned from Main Roads Journal. |
|
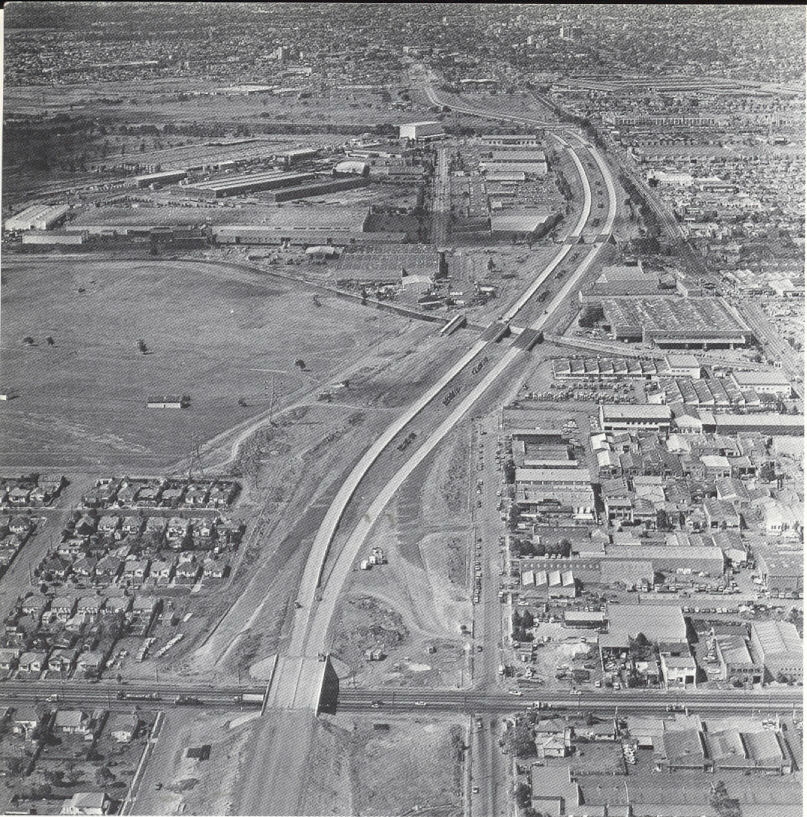 |
1979 view of adavanced earthworks looking east from Silverwater Rd. Scanned from Main Roads Journal. |
1977 view of construction at Hill Road. Scanned from Main Roads Journal. |
|
1977 view of earthworks looking west from Birnie Ave. Clearly visible is the congested Parramatta Rd. Scanned from Main Roads Journal. |
|
1978 view of construction at Birnie Ave. If you look closely you can see a double decker bus turning on Parramatta Rd. Scanned from Main Roads Journal. |
|
 |
1981 view of the motorway nearing completion near the old abbatoirs (now SYdney Olympic Park). Scanned from Main Roads Journal. |
 |
Early construction of the viaduct across the railway line at Homebush in 1978. Scanned from Main Roads Journal. |
Looking west over the section closely paralleling Parramatta Rd, Homebush in 1979. Scanned from Main Roads Journal. |
|
 |
1983 aerial view of the completed section at Homebush. Scanned from M4 Brochure. |
 |
Aerial view in 1985 of the newly completed extension from Sydney St, North Strathfield to Parramatta Rd at Concord. Photo scanned from Main Roads Journal. |