GLADESVILLE BRIDGE
& the Drummoyne to Lane Cove section of the North Western Freeway
Photos of the Gladesville Bridge and assosciated section of freeway |
|
 |
Looking north at Fig Tree Bridge, showing the pier design which enabled a lane on either side of the bridge to be 'clipped on' when the freeway was extended north, which of course never happened. Photo taken September 2003. |
 |
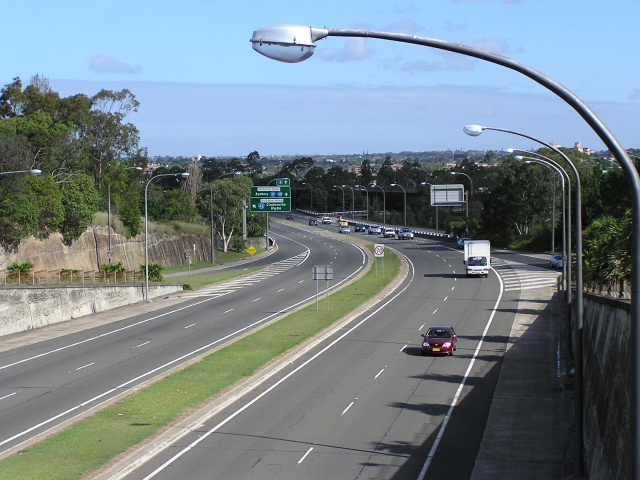
Looking north from Church St, Hunters Hill showing the freeway (now Burns Bay Rd) heading towards the Fig Tree Bridge across Lane Cove River. Photo taken April 2004. |
 |
Looking south from Church St to the bridge across Tarban Creek. Photo taken April 2004. |
 |
Looking north across Tarban Creek Bridge. This was to be the expressway to Newcastle once upon a time. Photo taken April 2004. |
 |
1970 view of Tarban Creek Bridge from the waters edge at Hunters Hill. Scanned from DMR Journal. |
 |
Another 1970 view of the Tarban Creek Bridge, this time looking north from the Victoria Rd overpass. Scanned from DMR Journal. |
 |
Looking east on Victoria Rd from the footbridge outside Riverside Girls High School. Photo taken April 2004. |
 |
Looking west from that same footbridge, the old alignment of Victoria Rd (Huntleys Pt Rd) approaches from the left at the traffic lights. Photo taken April 2004. |
 |
Looking east across the Parramatta River where the old cast-iron opening bridge once stood. Photo taken April 2004. |
 |
Aerial view over teh Tarban Creek bridge and the Hunters Hill Interchange during 1965. Scanned from Main Roads Journal. |
 |
1962 view of construction of the Gladesville Bridge, showing heavy traffic on the old bridge. Scanned from Main Roads Journal. |
Panoramic view from Hunters Hill showing the Huntleys Point Interchange and Gladesville Bridge in 1970. Scanned from DMR Journal. |
|
View of the Gladesville Bridge construction, clearly showing the arch structure, the largest concrete arch span in the world (at 1963). Scanned from 'The Roadmakers'. |
|
 |
Late 1964 view of the newly-opened bridge, showing the Burns Bay Rd connection still under construction. Scanned from DMR Journal. |
1965 view of the eastern approach to the Gladesville Bridge. Note the 'Golden Fleece' petrol station which is now a 711. Scanned from DMR Journal. |
|
Easterly view of heavy traffic on the old Gladesville Bridge in 1962. This bridge also carried tram traffic and at one point in time was made one-way in the direction of peak hour travel. Scanned from DMR Journal. |
|
 |
A direct replacement of the very old 1960's signs littered all over this section with the word 'expressway' on them. A haunting reminder of the road's former glory. This sign has actually been removed after being vandalised by the lovely girls of Riverside Girls HS. Photo taken September 2003. |
 |
Another former expressway sign, this time at the Hunters Hill Interchange. Photo taken September 2003. |
 |
The other surviving expressway sign at the Hunters Hill Interchange. Photo taken April 2004. |
 |
Aerial view of the Gladesville Bridge and North Western Freeway complex in 1987. Scanned from "Bush track to highway" by Austroads. |
 |
Atmospheric dusk shot of Gladesville Bridge from Huntleys Point. Source: Stuart Watts, 2007. |
 |
A dusk shot of the grade-separated interchange at the western end of the bridge. Source: Stuart Watts, 2007. |
A westerly view from Hunters Hill towards Tarban Creek bridge. Source: Stuart Watts, 2007. |
|
Last updated 30 May 2009 © Ozroads 2004-2009. |