F3 Sydney - Newcastle Freeway HISTORIC PHOTOS
Section: Berowra to Calga
To view historics photos of the F3 between Wahroonga and Berowra, click HERE. |
|
 |
Old freeway green northbound RD sign from the Berowra interchange. This sign was removed and never replaced not long after this photo was taken in September 1993.
|
Southerly aerial view over the newly completed Berowra Interchange in 1968.
Source: Main Roads, March 1969. |
|
 |
Southerly aerial view over the Berowra toll booths in 1968.
Source: Main Roads, March 1969. |
 |
Northerly aerial view over the Berowra Interchange with the Berowra-Wahroonga stage of the F3 still under construction in 1988. Thanks to Lachlan Sims for this pic.
Photo scanned by Lachlan Sims. |
 |
Looking south on the freeway on/offramps through where the Berowra toll booths used to be. The old building on the left is the southbound weigh station that was closed in 1989 and replaced by the Mt White weigh station. |
 |
Looking south on the Pacific Hwy where the old weigh station was.
Photo taken August 2004. |
 |
Looking north on the Pacific Hwy towards the freeway ramps in September 1993. Note the freeway green and painted 'standard green' signs. These signs have since been replaced by these signs.
|
 |
Construction of the Berowra-Hawkesbury River section in 1967.
|
 |
Looking south through Cowan during construction, 1967.
|
Looking south over Cowan not long after opening, 1968.
|
|
Looking south over the F3 at Brooklyn, not long before opening in 1968. |
|
 |
Looking north over the Hawkesbury River, 1968. Photo scanned by Lachlan Sims. |
 |
Southerly view over the Pacific Hwy overpass at Brookyln in 1968. Note the temporary southbound on-ramp from the Pacifc Hwy that serviced southbound traffic between 1968-73.
Photo scanned by Lachlan Sims. |
Northerly aerial view over the Hawkesbury River in 1968, just before opening day. Scanned from Main Roads Journal. Source: Main Roads, March 1969. |
|
 |
Southerly aerial view over the temporary southern approach to Peats Ferry Bridge, still under construction in 1967. Scanned from Main Roads Journal. Source: Main Roads, December 1968. |
 |
The temporary northbound ramp from the Berowra-Hawkesbury River construction stage to the Peats Ferry Bridge which freeway and highway traffic shared for 5 years. Traffic signals were installed to assist with the merging process, especially when the bridge was only one-lane northbound.
Photo taken 1970. |
 |
Looking south from Mooney Mooney showing construction of the freeway bridge over the Hawkesbury River in 1970. |
 |
Southerly aerial view showing construction of the freeway bridge over Hawkesbury River in 1971. |
 |
Construction of the bridge deck in 1972. |
Hawkesbury River Bridge nearing completion in 1973. Source: Main Roads, June 1973. |
|
Looking south over the newly opened Hawkesbury River Bridge in 1973.
Source: Main Roads, December 1973. |
|
 |
Southerly aerial view over the two Hawkesbury River bridges side-by-side in 1975.
|
 |
Looking north along Pacific Highway immediately north of Peats Ferry Bridge, showing the beginning of the Hawkesbury River-Mt White section of the freeway (straight) and the exit ramp for Pacific Highway branching off to the left. Note that the bridge comprises a single northbound lane and two southbound lanes at this stage. Source: Kevin Noble, January 1966. |
 |
Looking south from the toll booths (the driver would have just paid the toll before this photo was taken) towards the merge with Pacific Highway and the Hawkesbury River bridge. Source: Kevin Noble, January 1966. |
 |
Northerly view of the Mooney Mooney tolls not long after opening in 1965. Photo scanned by Lachlan Sims. |
 |
Southerly view over the Mooney Mooney tolls in 1966. The interchange was redeveloped in 1989 in conjunction with the Berowra-Wahroonga section to include southbound on/off ramps. Scanned from Main Roads Journal. Source: Main Roads, March 1966. |
 |
Looking south towards the toll booths at Mooney Mooney. Source: Kevin Noble, January 1966. |
 |
Looking south at the safety ramp on the descent from Jolls Bridge towards Mooney Mooney. Source: Kevin Noble, January 1966. |
 |
Looking south towards Jolls Bridge, shown under construction in the middle right of the photograph. The road passing through the centre-left of the photo is the Pacific Highway which was realigned away from the route of the freeway which passes right over the top of the original highway alignment. Source: Kevin Noble, October 1964. |
 |
A northerly view of the freeway construction at Jolls Bridge. Source: Kevin Noble, October 1964. |
 |
Looking southwest from a nearby hilltop towards Jolls Bridge, showing construction nearly complete. Source: Kevin Noble, June 1965. |
 |
A driver's perspective looking north towards Jolls Bridge, not long after opening. Source: Kevin Noble, January 1966. |
 |
A driver's perspective looking south towards Jolls Bridge, not long after opening. Source: Kevin Noble, January 1966. |
 |
Northerly aerial view over Jolls Bridge, 1966. Photo scanned by Lachlan Sims. |
 |
Southerly aerial view over Jolls Bridge, 1966. |
 |
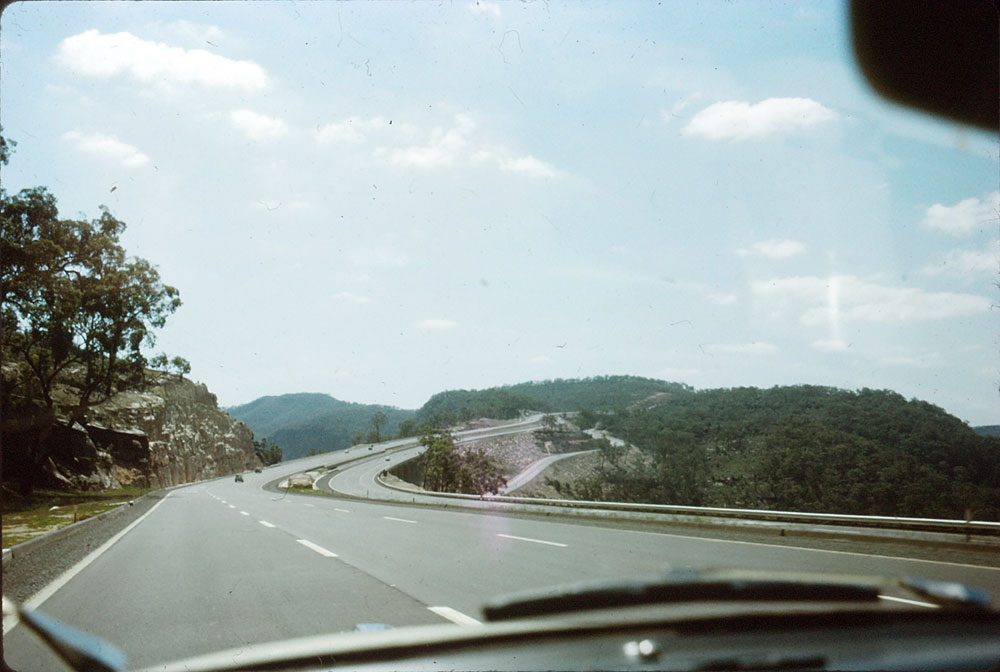
Looking south through a deep cutting, 4km north of the Hawkesbury River, not long after opening. Source: Kevin Noble, January 1966. |
 |
Construction of the Hawkesbury River-Mt White stage in 1963.
|
 |
Looking north, showing construction of the road base well underway, approximately 6km north of the Hawkesbury River. Source: Kevin Noble, June 1965. |
 |
Looking north, showing construction of the road base well underway, approximately 6km north of the Hawkesbury River. Source: Kevin Noble, June 1965. |
 |
Looking north, showing construction of the road base well underway, approximately 7km north of the Hawkesbury River. Source: Kevin Noble, October 1964. |
 |
Looking north over the construction site for the twin bridges that take the freeway over Pacific Highway, 2km south of Mt White. To the left you can see the start of the four lane section of Pacific Highway which was the first 'Motorway' (as per the Main Roads Act definition) in NSW. Source: Kevin Noble, October 1964. |
 |
A driver's perspective looking south towards the overpass carrying the freeway over Pacific Highway, 2km south of Mt White, not long after opening. Source: Kevin Noble, January 1966. |
 |
Looking north over the freeway where it crosses Pacific Highway, 2km south of Mt White. Source: Department of Main Roads. |
 |
A view through the trees towards the south, showing the Mt White interchange earthworks well underway. Source: Kevin Noble, October 1964. |
 |
A similar view, this time showing the pavement freshly laid. Source: Kevin Noble, June 1965. |
 |
Mt White interchange, half completed during construction of the Mt White-Calga stage in 1965. |
Looking north from Mt White interchange with the Mt White-Calga section under construction in 1965.
Source: Main Roads, March 1966. |
|
 |
Looking south to Mt White, 1966. Photo scanned by Lachlan Sims. |
 |
Looking north from Mt White to Calga in 1967. |
 |
Looking south over Mt White interchange in 1970. |
 |
Looking north at Mt White, 1975. |
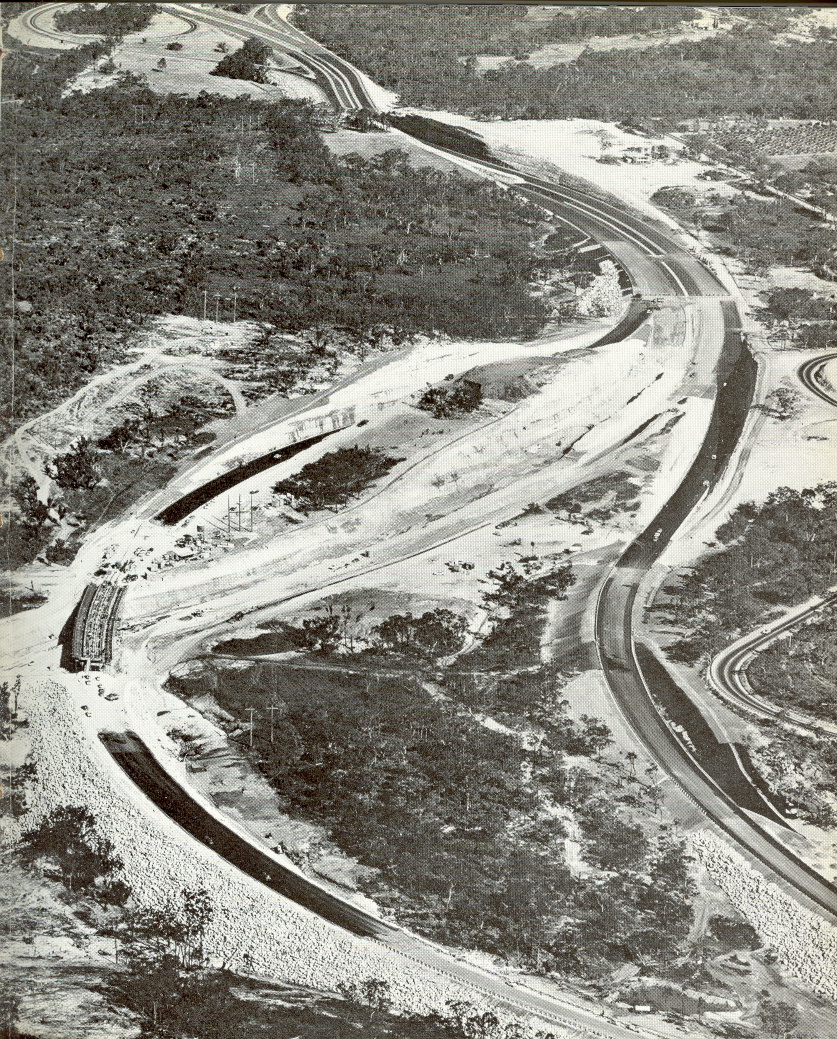 |
Construction of the phantom interchange north of Mt White during 1965. It is clear where the freeway would have gone to cross Mooney Mooney Creek originally. This interchange was reconstructed in 2003.
Source: Main Roads, September 1966. |
 |
Construction of the phantom interchange in more detail, again during 1965. Plenty of money was spent excavating the cuttings for the F3 mainline route that was never built.
Source: Main Roads, September 1966. |
 |
Aerial view of Calga before the freeway construction was begun in 1964.
Source: Main Roads, March 1964. |
 |
Looking north at the original Calga interchange. As you can see from the signs, NR1 was not initially routed via Peats Ridge - this did not occur until conversion of National Route 1 to National Highway 1 in 1979.
Source: Department of Main Roads. |
 |
Southerly aerial view over the original Calga interchange in 1966. Note the old section of Peats Ridge Rd that was cut off by the interchange construction.
Photo scanned by Lachlan Sims. |
 |
Southerly aerial view over the reconstructed Calga interchange in 1986.
Photo scanned by Lachlan Sims. |
 |
Southerly aerial view over Calga interchange in 1986. You can clearly see where Peats Ridge Rd once merged straight onto the freeway.
|
 |
Southerly view along what once was the southbound carriageway of the freeway, connecting from Peats Ridge Rd. These bridges are now unused, except as a stockpile for construction equipment.
Photo taken June 2003. |
To view historics photos of the F3 between Calga and Ourimbah, click HERE. |
|
Last updated 30 March 2011 © Ozroads 2004-2011. |